Lego Custom Train Cars
During my Lego train displays, there are many questions about how to build your own custom Lego train car. Although I do give tips, I thought it would be better to do a quick overview here. I'll probably do a video on my ICIC-ation YouTube channel, but this is a quicker way to get the basic info out there. I currently have a large backlog of things to put on my YouTube page!
Start with a set:
For beginners, I think the best starting point is to just purchase a Lego train
set which has the Powered Up
parts included. Some Lego train sets are just
moved by hand, those with Powered Up
components have a motor and remote
control (and can also be controled using an app). Although they are expensive,
everything you need is included in the box (except batteries) so you do not
have to seek out individual parts yourself. Then building the train as per
instructions can be helpful so you can see how the wheels, motor, and hub work
together to make the train move.
Currently (as of October 2024) there are two good Lego sets to start with:
Freight train (set #60336 for $199.99)
Express train (set #60337 for $189.99)
The freight train has some extras and different size car bases, so I consider
that to be an advantage in options for personal creativity.
Although the about $200 price seems high, consider that those sets INCLUDE
the 2-port hub (Set #88009, $49.99 retail), the train motor (Set #88011,
$13.99 retail), the remote control (Set #88010, $22.99 retail) and about
$40 worth of track (creates a small oval layout). So $126.97 of the set
cost covers some track and the Powered Up
components you would have to
purchase yourself anyway. So the rest of the parts in the box only cost
about $70!
As an alternate option, you may be able to get a Lego train set cheaply at a garage or estate sale. If your goal is to build custom train cars, then some missing parts isn't critical as long as the wheels, wheel assemblies, couplers, and bed plates are in good shape.
If you would like a larger track layout, Lego sells track bundles under the
City
theme. Such as:
Set #60205 for $19.99 which has 8 straight track, 4 curve track, and 8 flexible track.
Set #60238 for $15.99 which has 2 switches (1 right, 1 left) and 4 curve track.
There is no requirement to use Powered Up
if your train is stationary or
would be moved only by hand. There is no requirement to build a set as per
instructions either, just may be helpful to get experience. You can always
just build train cars from scratch using your own imagination.
Parts used:
So that brings us to the part about actually building a custom train car. Here we will only discuss the 'base', that is the wheel assembly and the bed plate. From there you can build whatever you want to on the bed plate.
If you have a Lego train set, then you already have the components needed. But I have included the Lego part information (Design and/or ID numbers) should you need to obtain them. This part information is believed to be accurate as of October 2024, but verify before you make a purchase! These can be purchased from Lego or other sources, but always verify the part is the one you want before you finalize the order! A Lego representative can be of great help if you call them to order parts!
A simple train car base:
Lego train cars without a motor are simple to build, so we will start with them. For these we just need two wheel assemblies, two couplers, a bed plate, and a way to connect the wheel assembly to the bed plate. It sounds more complex than it actually is.
Real trains typically have 8 wheels per train car, 2 pairs of 2 wheels at each end. This not only divides the weight which each wheel must carry but also insures that if one wheel is damaged the other wheel can take the workload to avoid (or at least delay) a derailment. We will make our wheel assembly using this same setup, although you could use just 1 pair of 2 wheels if desired.
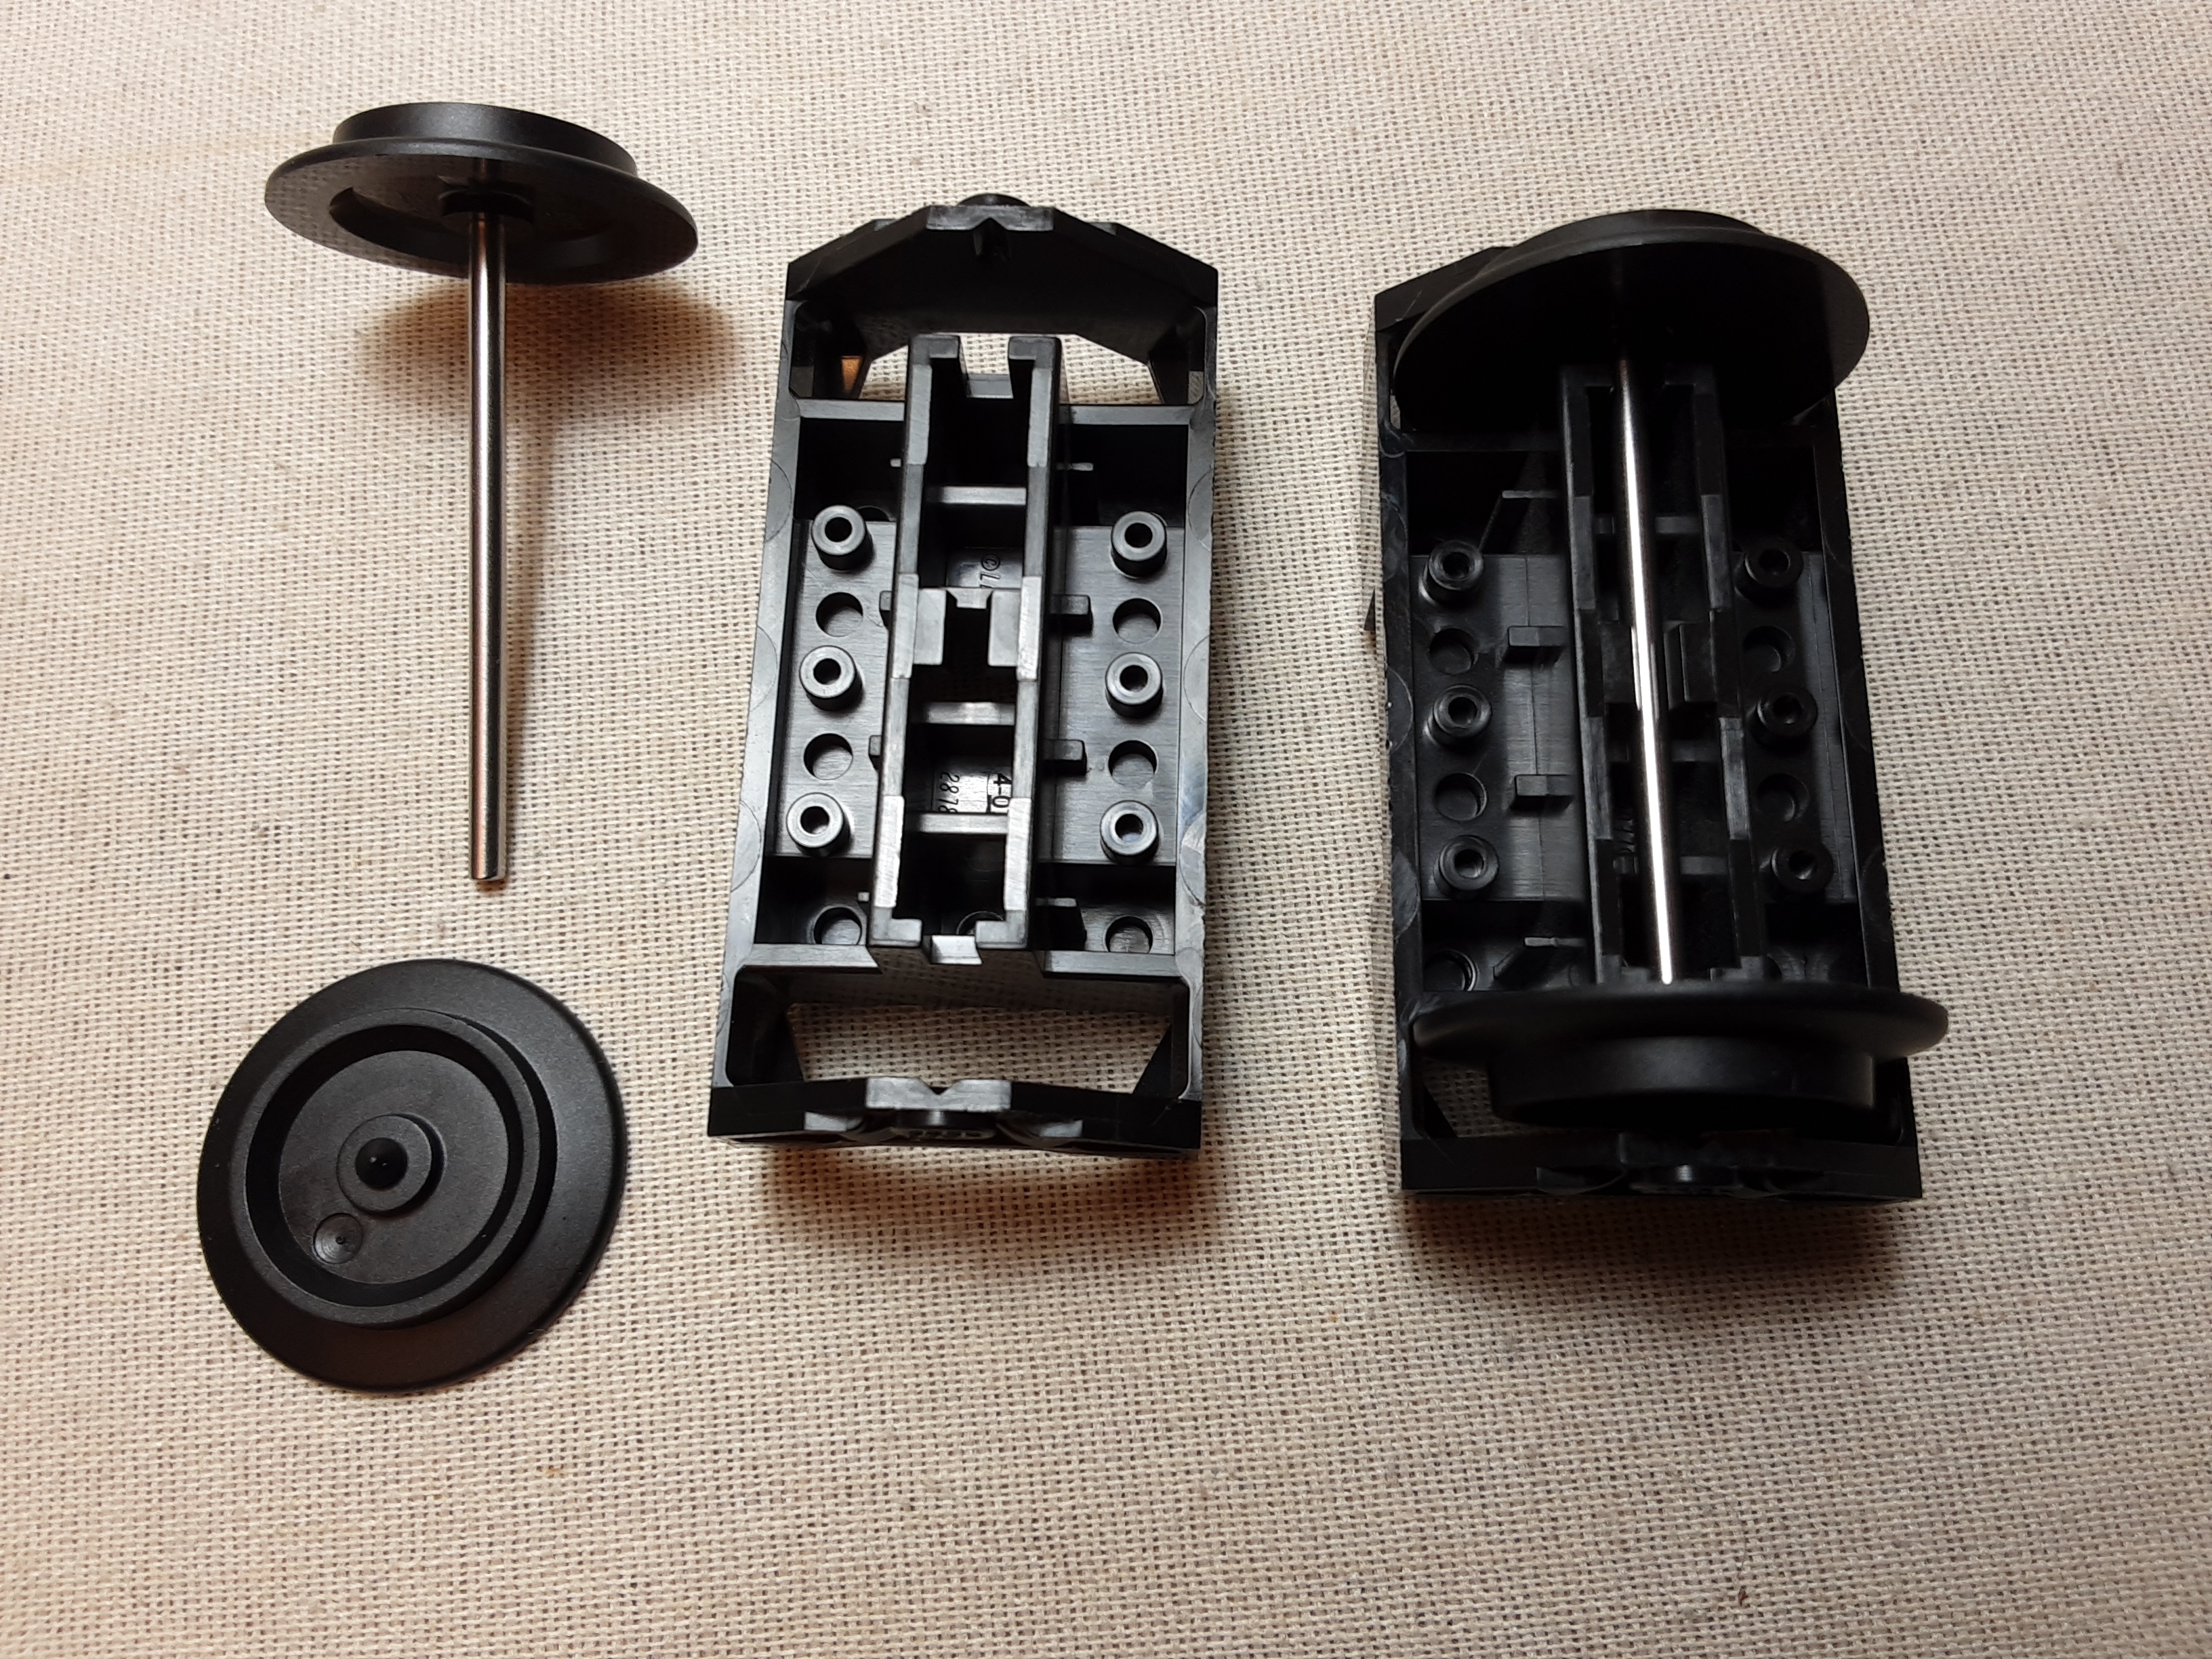
We start by attaching 2 wheels to 1 axle. Each wheel (ID #4496343, Design #57878 or #38340) snaps to the end of the metal axle (ID #4298979, Design #x1687). Make sure the smallest part of the wheel is at the end of the axle, as the largest part rides INSIDE of the track rail. Then the axle snaps into the clip channel of the Wheel Housing (ID #287826, Design #2878).
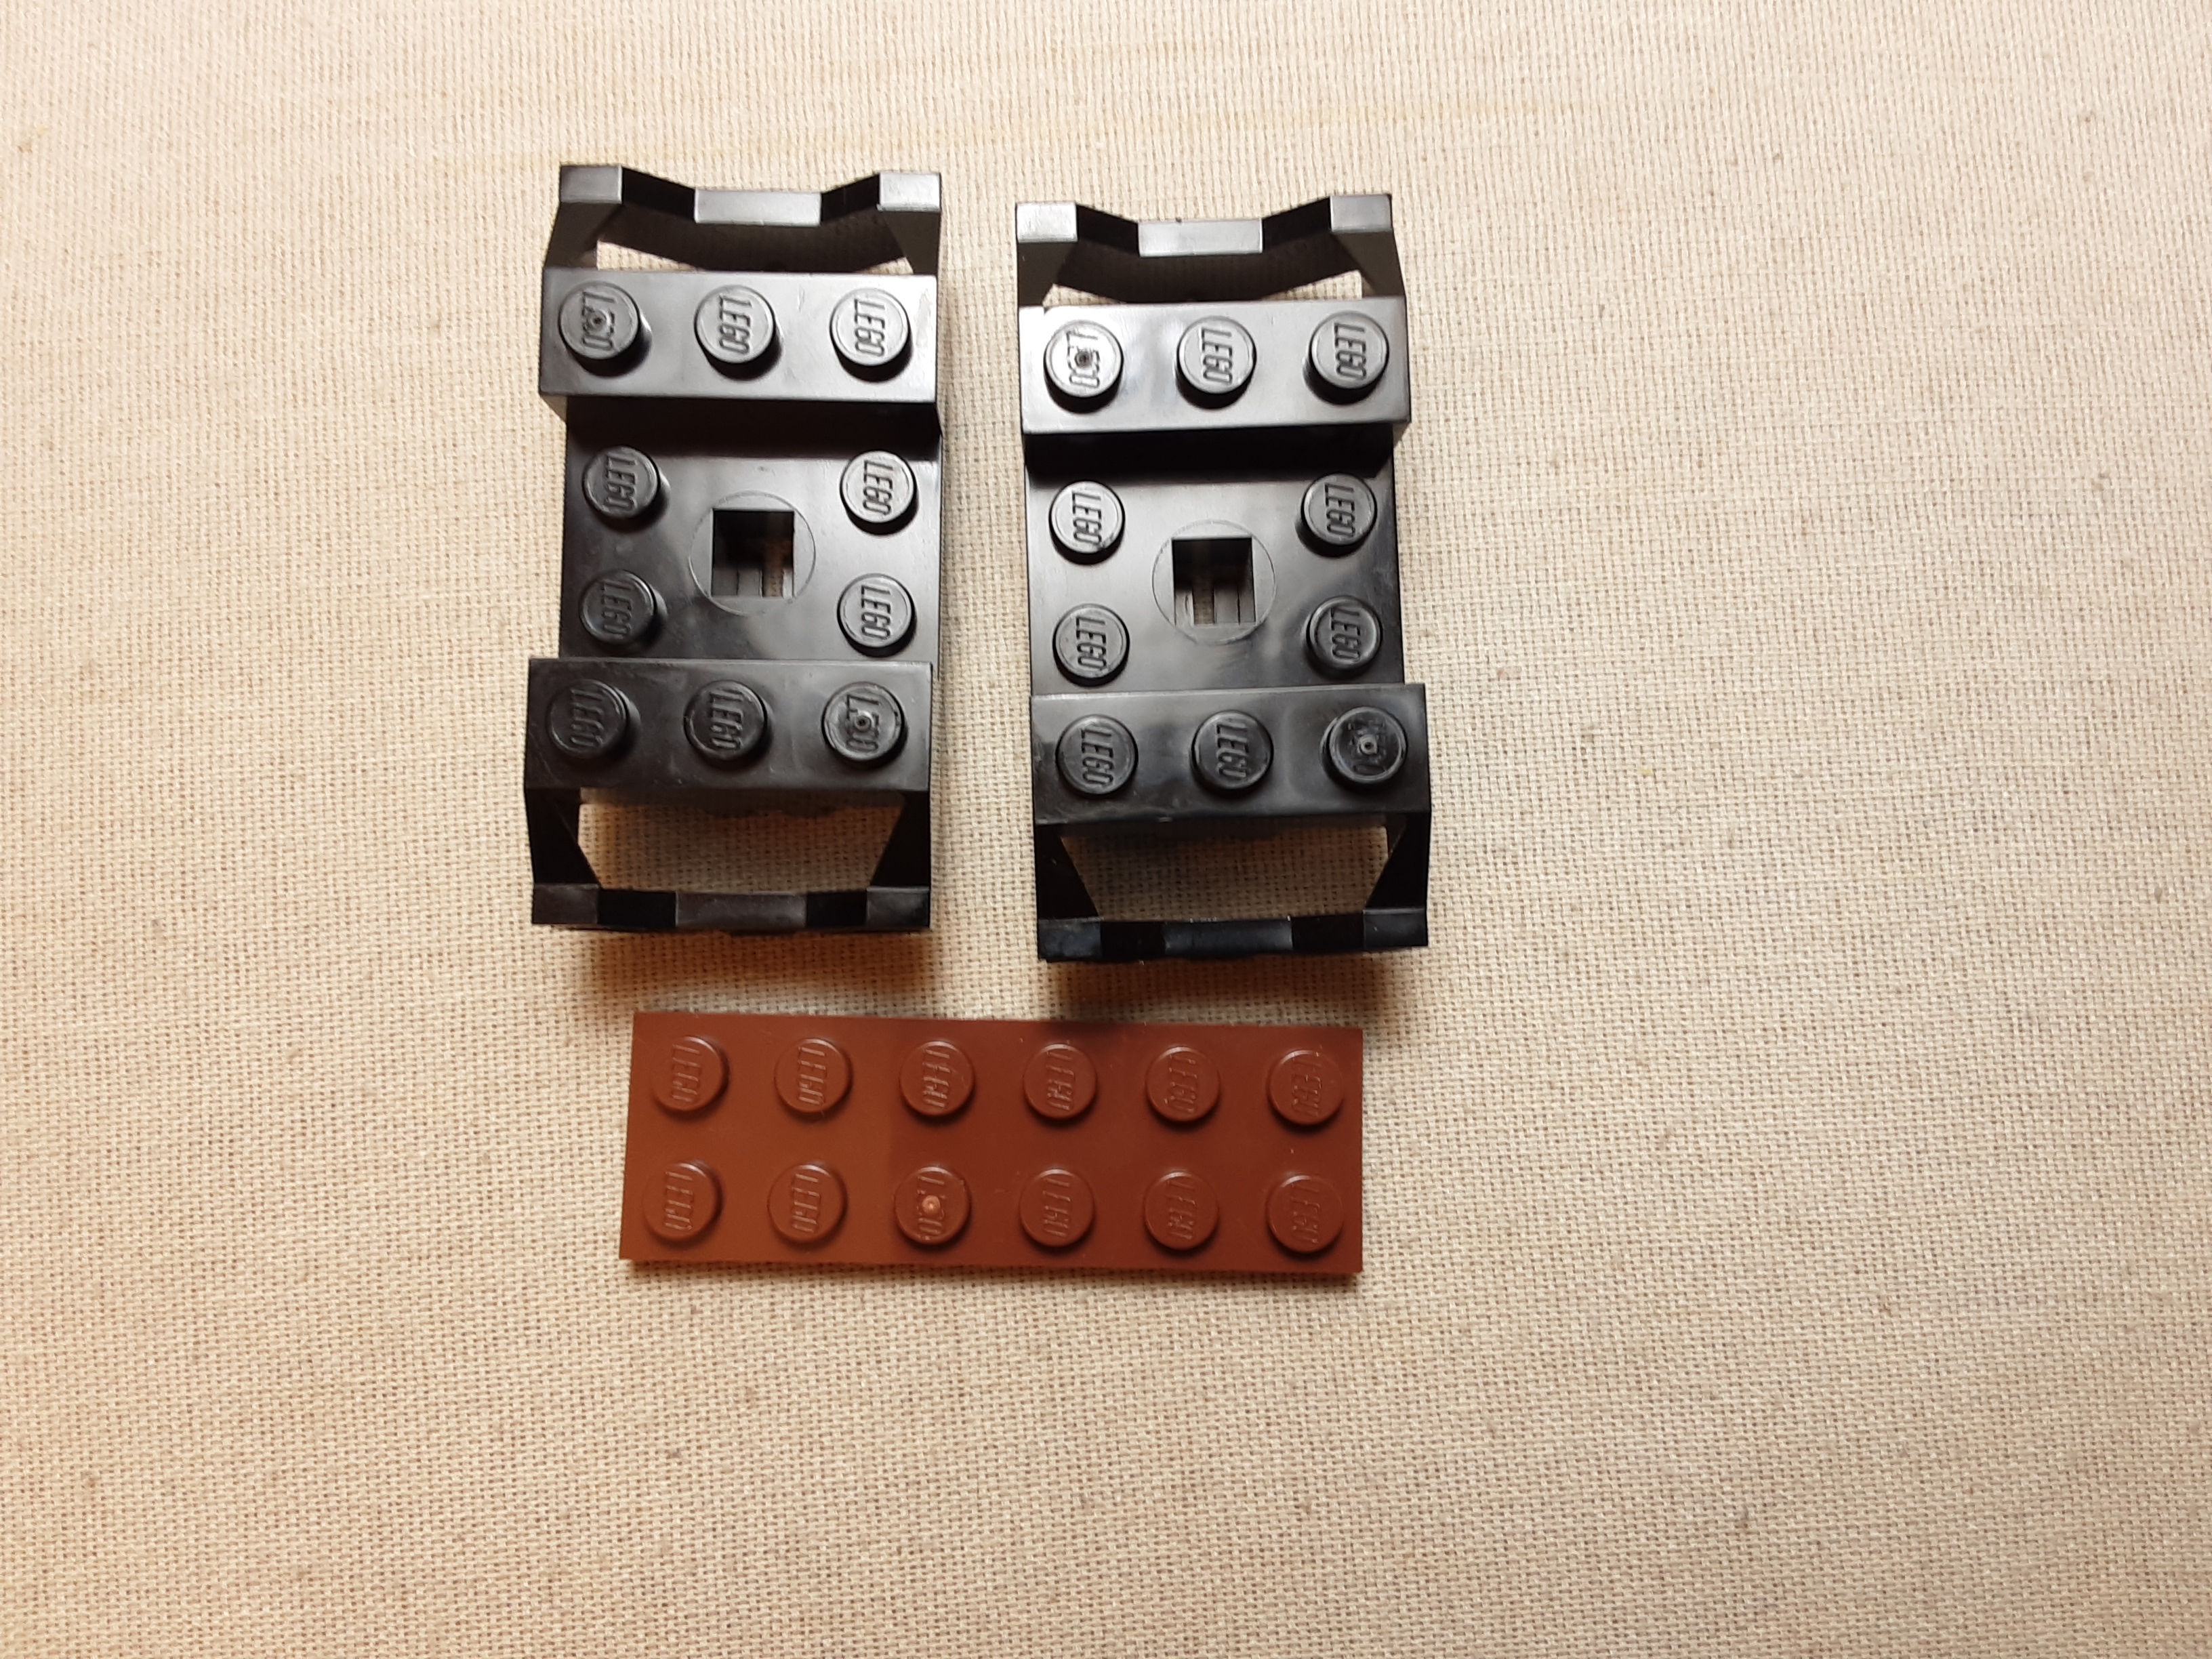

Once we have 2 Wheel Housings built, we can connect them using a 2x6 plate (any color you desire).
At one end of the 2x6 plate, we mount the Magnetic coupler (ID #6172149, Design #29084 or #29085). Note that the top of the coupler is flat (has no studs) and is now even with the top of the wheel housing. Next fill in the rest of the 2x6 plate with either a 2x4 plate or 2 2x2 plates.
Since the bed plate will sit directly above the wheel assembly, we need to use tiles (no studs on top) to allow the wheel assemblies to move without bumping against the bed plate. A 2x4 tile make a more sturdy base, even though my example photo shows 2 2x2 tiles. The tiles above the coupler keep it in place.
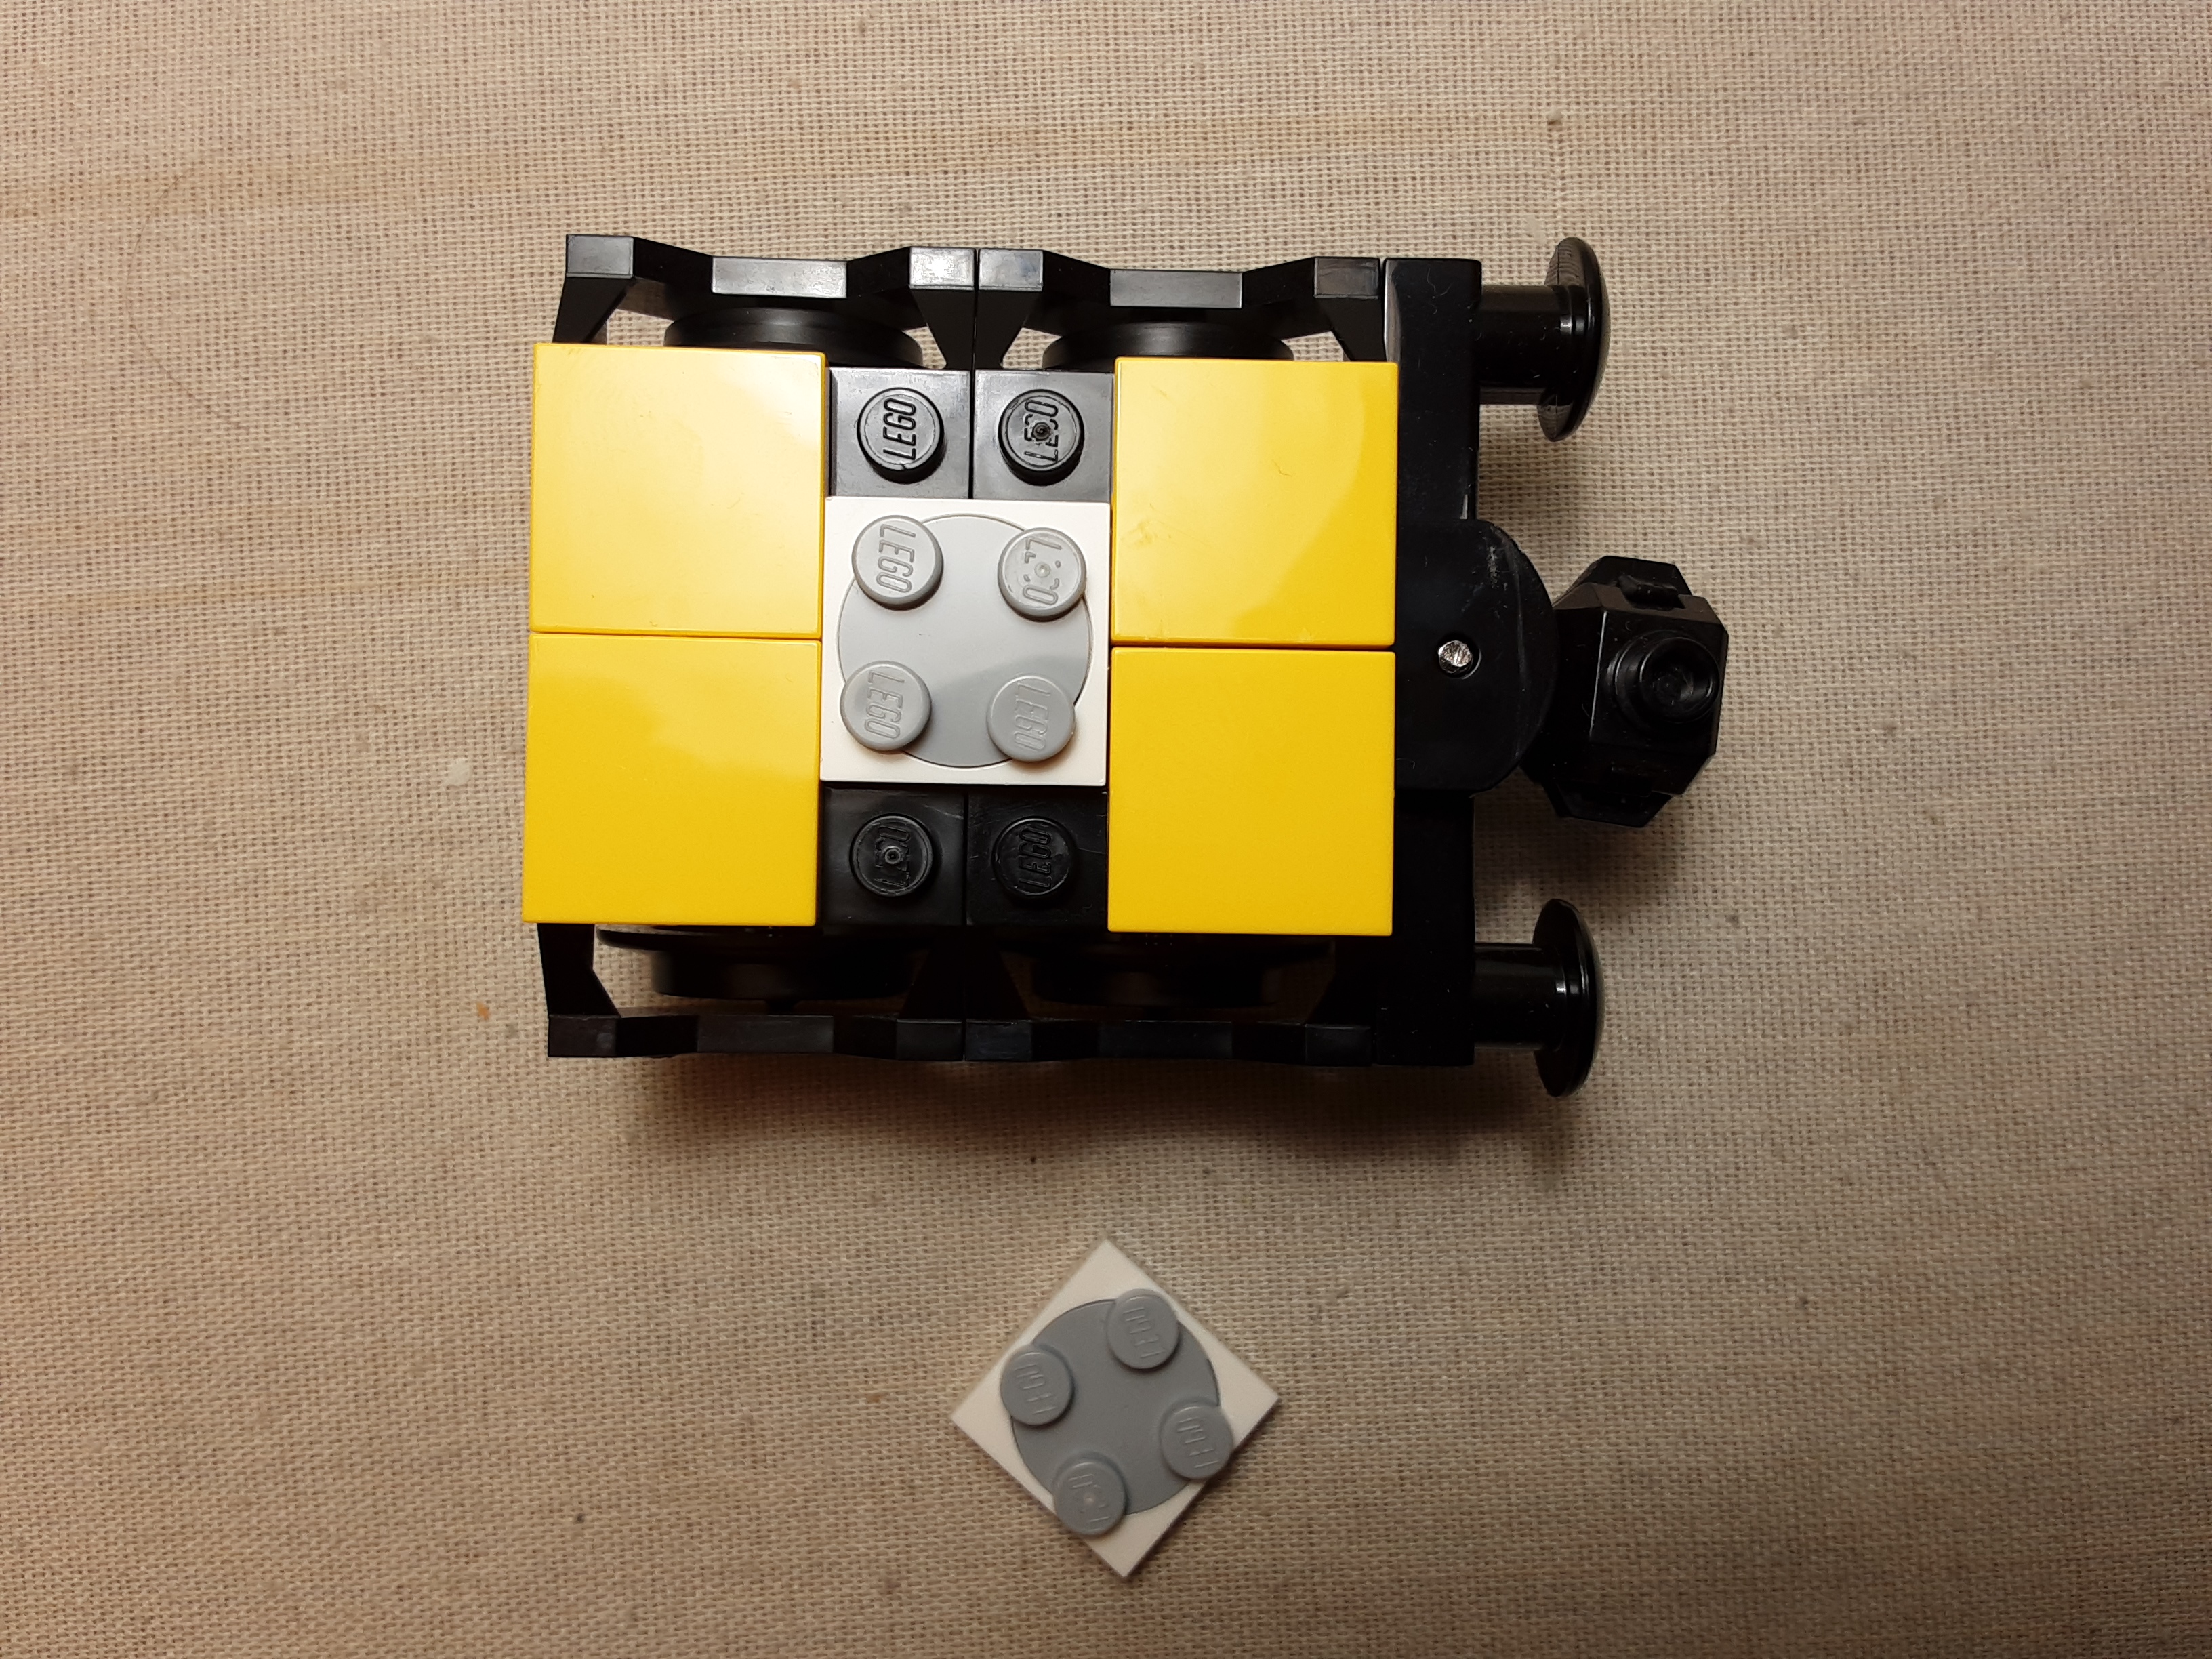
Finally, we place a Turntable (bottom Design #3680, top Design #3679) in the center. This is what allows the wheel assembly to swivel when the track bends. I use a 2x2 Turntable, but a 4x4 turntable could be used instead (changing the other tiles to 1x2 or 1x4).
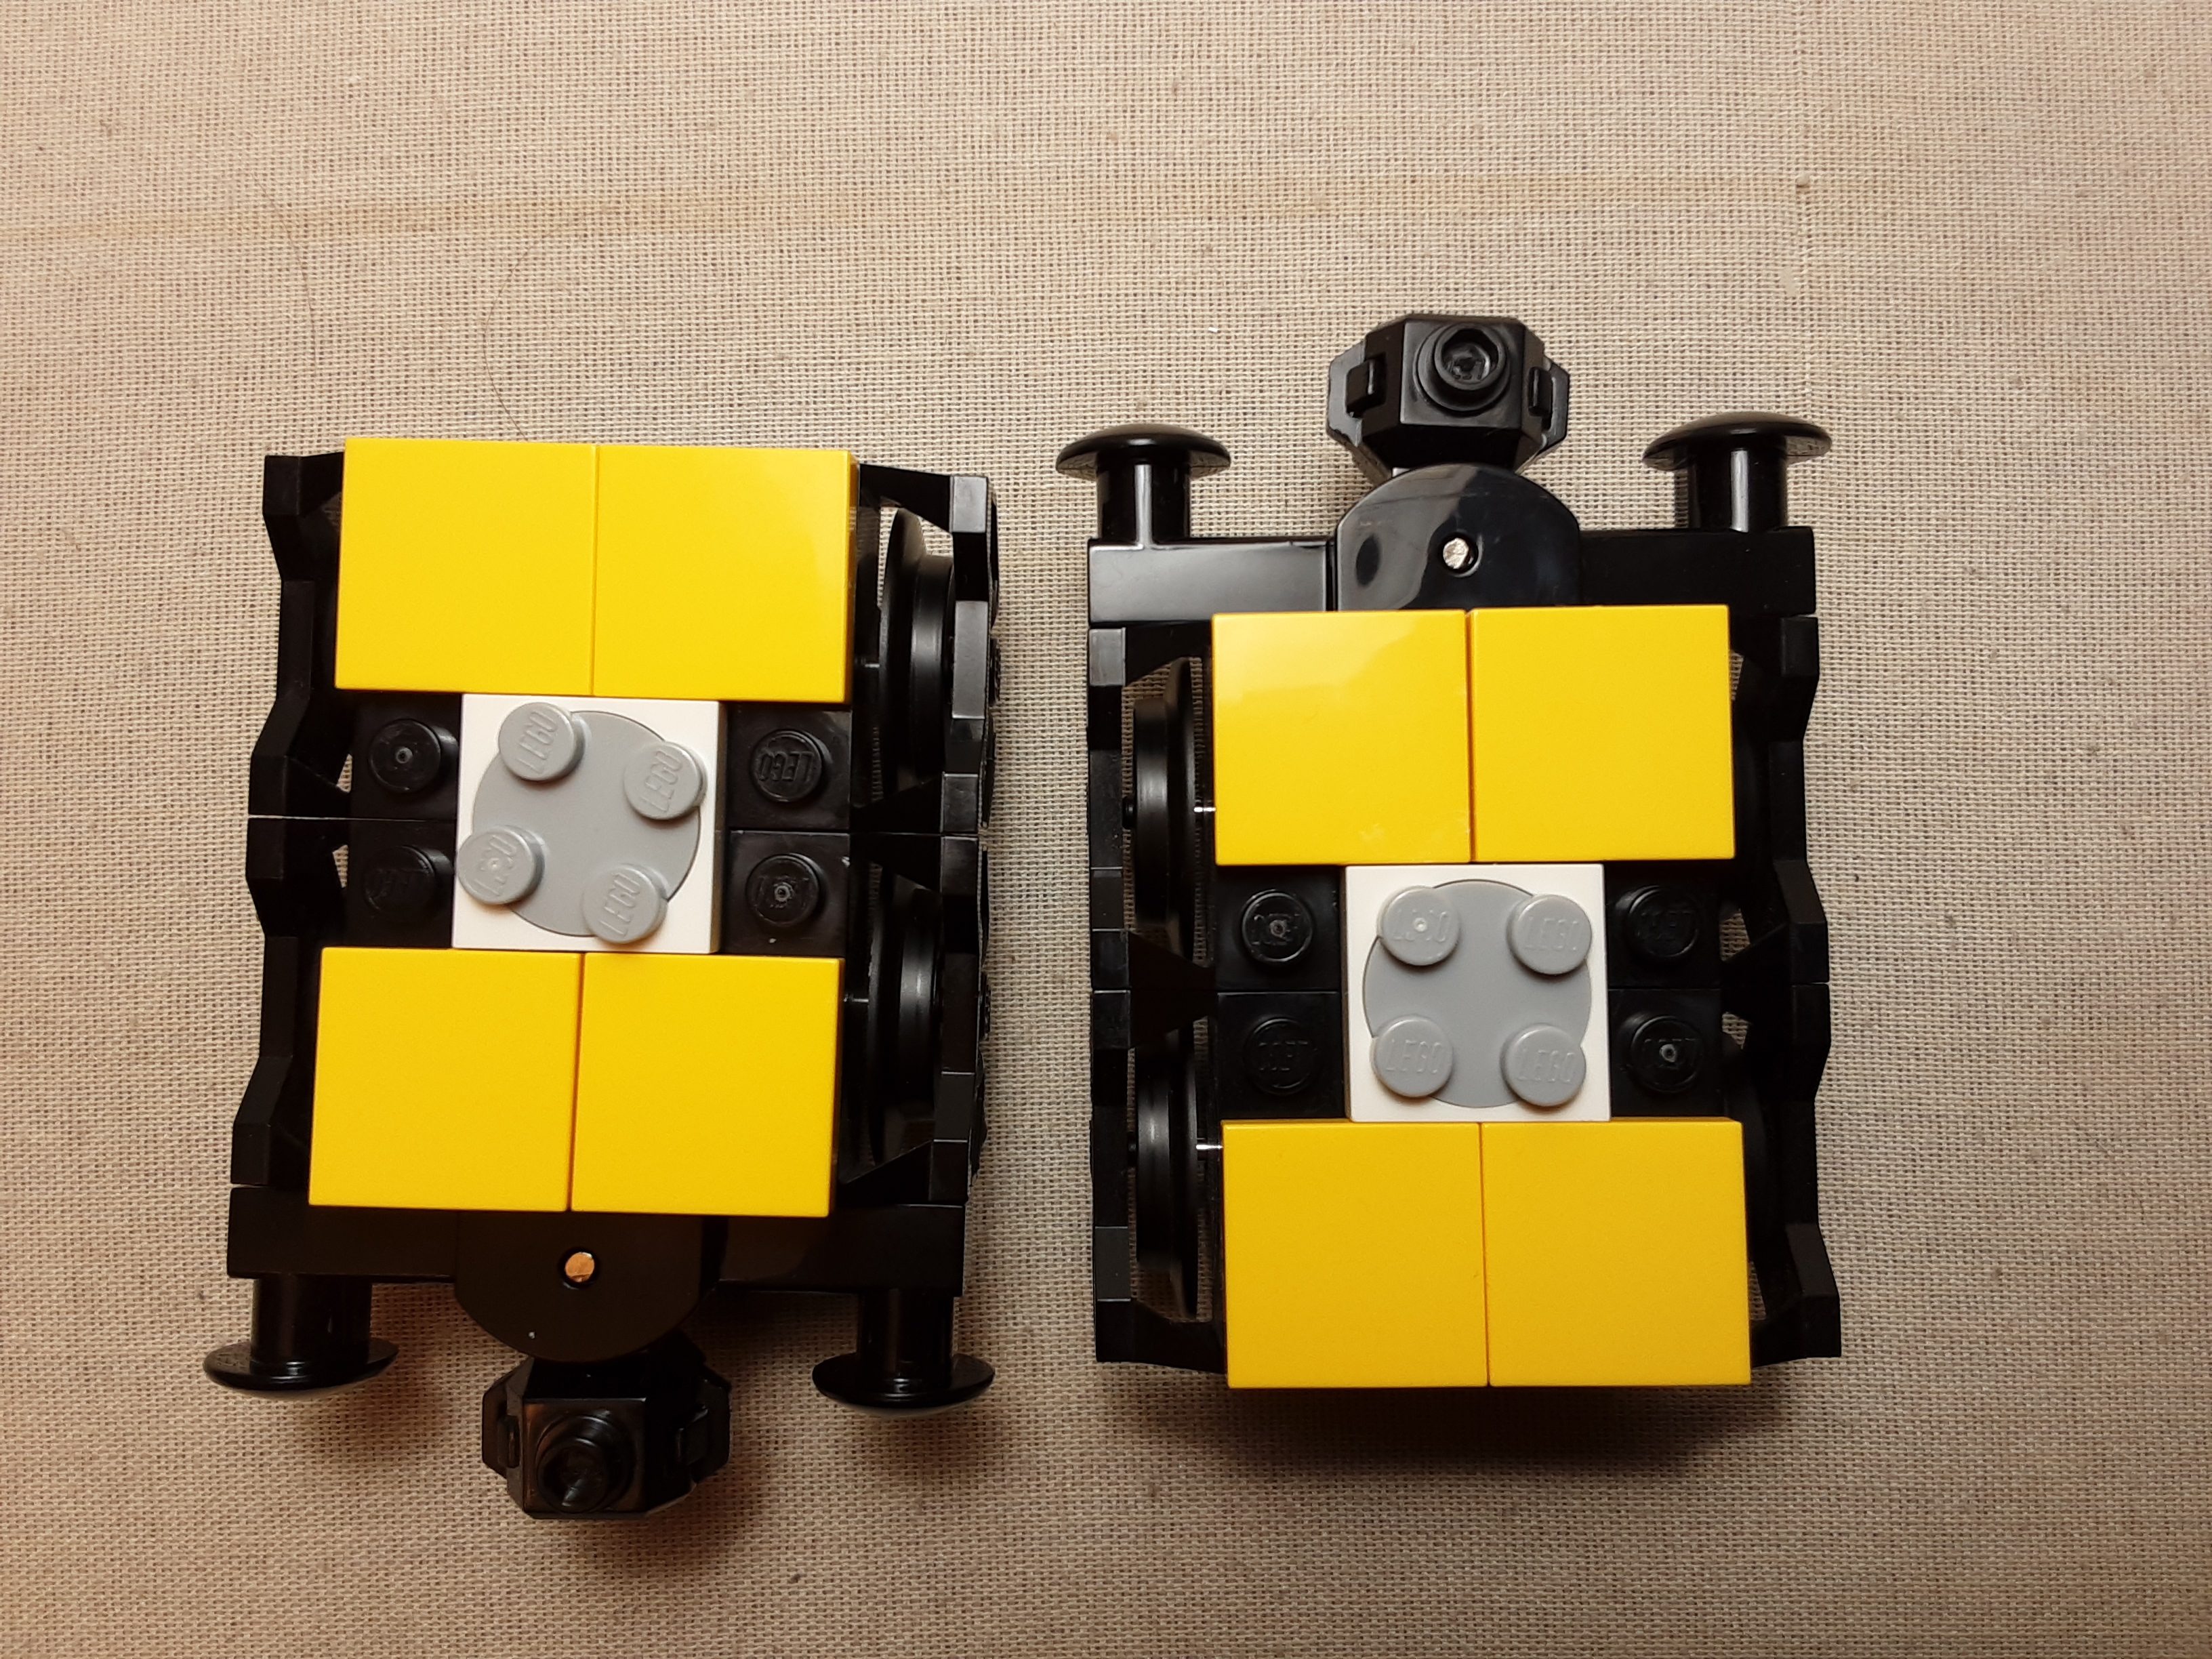
Build the second wheel housing assembly in the same way as the first. This provides one for each end of the train car.
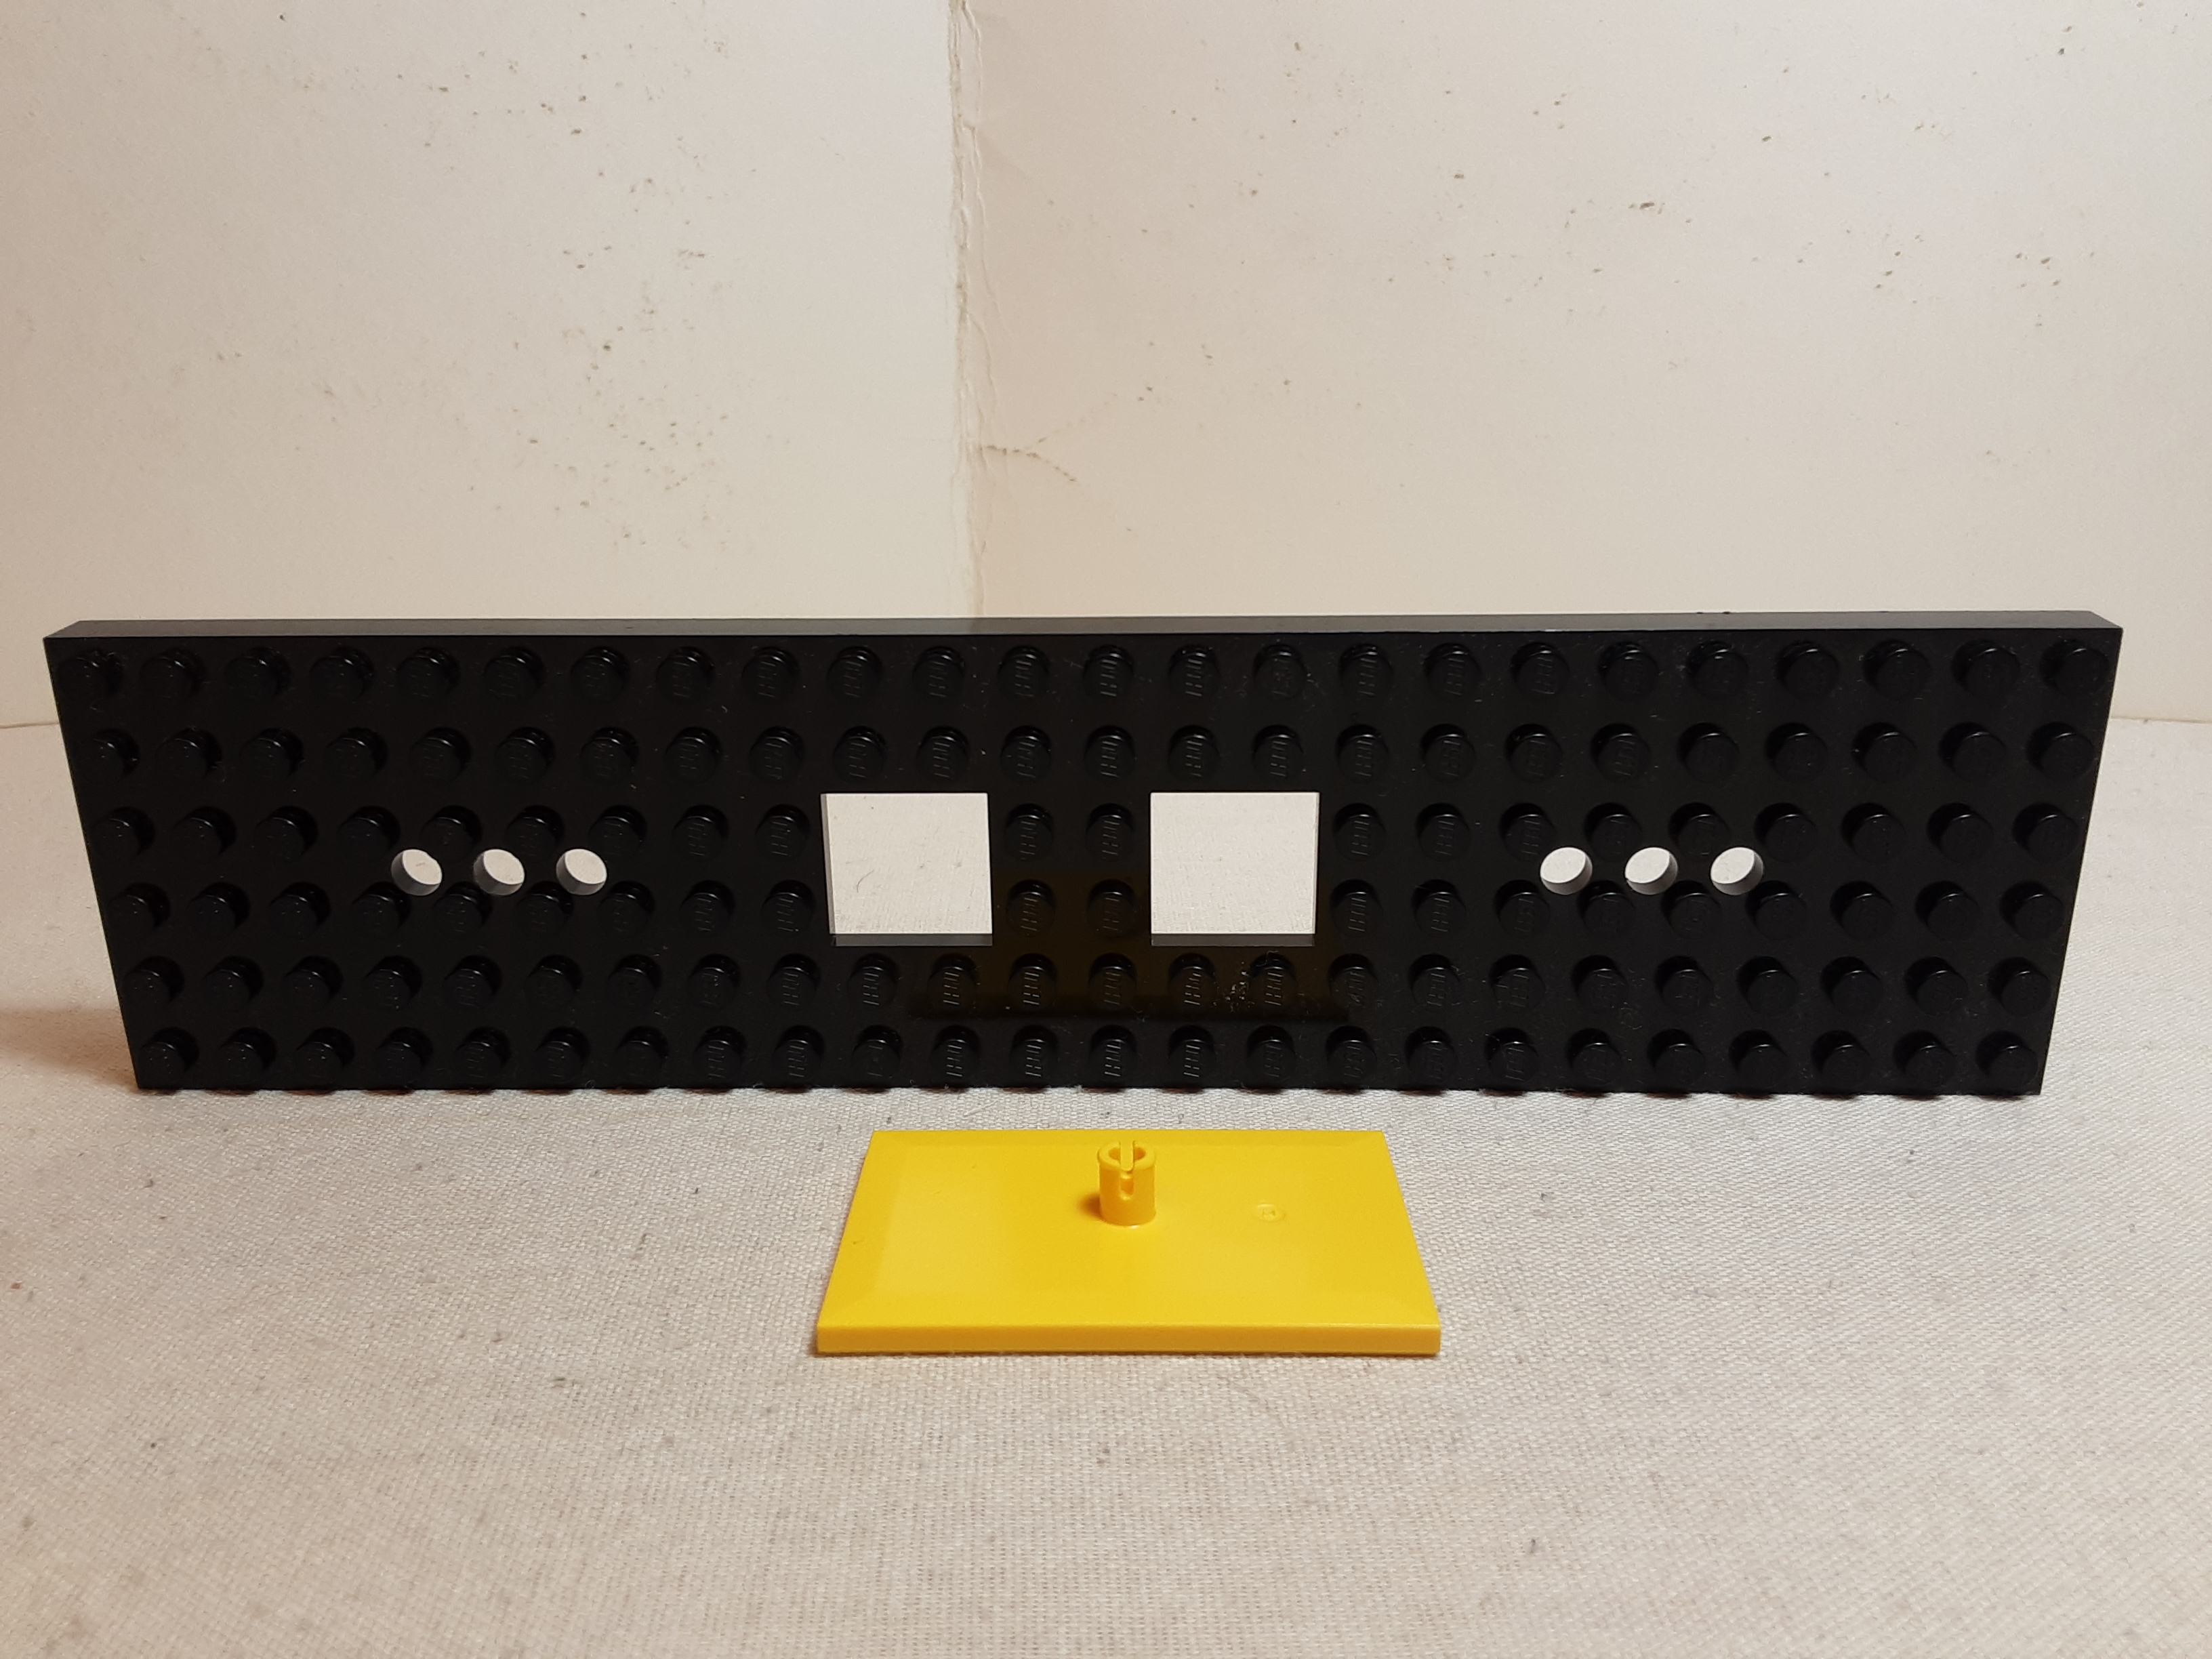
Now the studs of the Turntables can be attached to the bed plate. Make sure that the coupler and its bumpers extend beyond the edge of the bed plate. This will allow enough room for the coupler to swivel on a curved track without hitting the bed plate. The example shows a 6x16 bed plate, but larger plates up to 8x28 could be used. Using a bed plate longer than 28 studs can make the train car derail on a curve due to the difference in angle between the front and rear wheels!
I suggest removing the wheel assemblies whenever building a train car. Doing so allows for a stable work place (as the bed plate is flat on the table). It also prevents damaging the plastic wheels or bending the bed plate due to any extra pressure applied during the building process.
Train chassis and Bogie plate:
Although the use of a Turntable to secure the bed plate to the wheel assembly works pretty well for most train cars, its disadvantage is that too much vibration or uneven weight distribution can cause it to disconnect. So for a more durable connection, we can use a Bogie Plate.
A Bogie plate (ID #6086730, Design #4025) is a special 4x6 tile plate with an upward pin. Its smooth top surface allows for low friction swivel motion between the Bogie Plate and the bed plate. The pin on the top mounts in a hole on a bed plate above it. The pin/hole system is stronger than a stud/tube connection, so it provides for a sturdy connection.
But most Lego plates do NOT have pin holes in them! However, Lego does make
a special Train Chassis
plate which is designed to be used with the Bogie
Plate and also has holes for wiring to pass through.
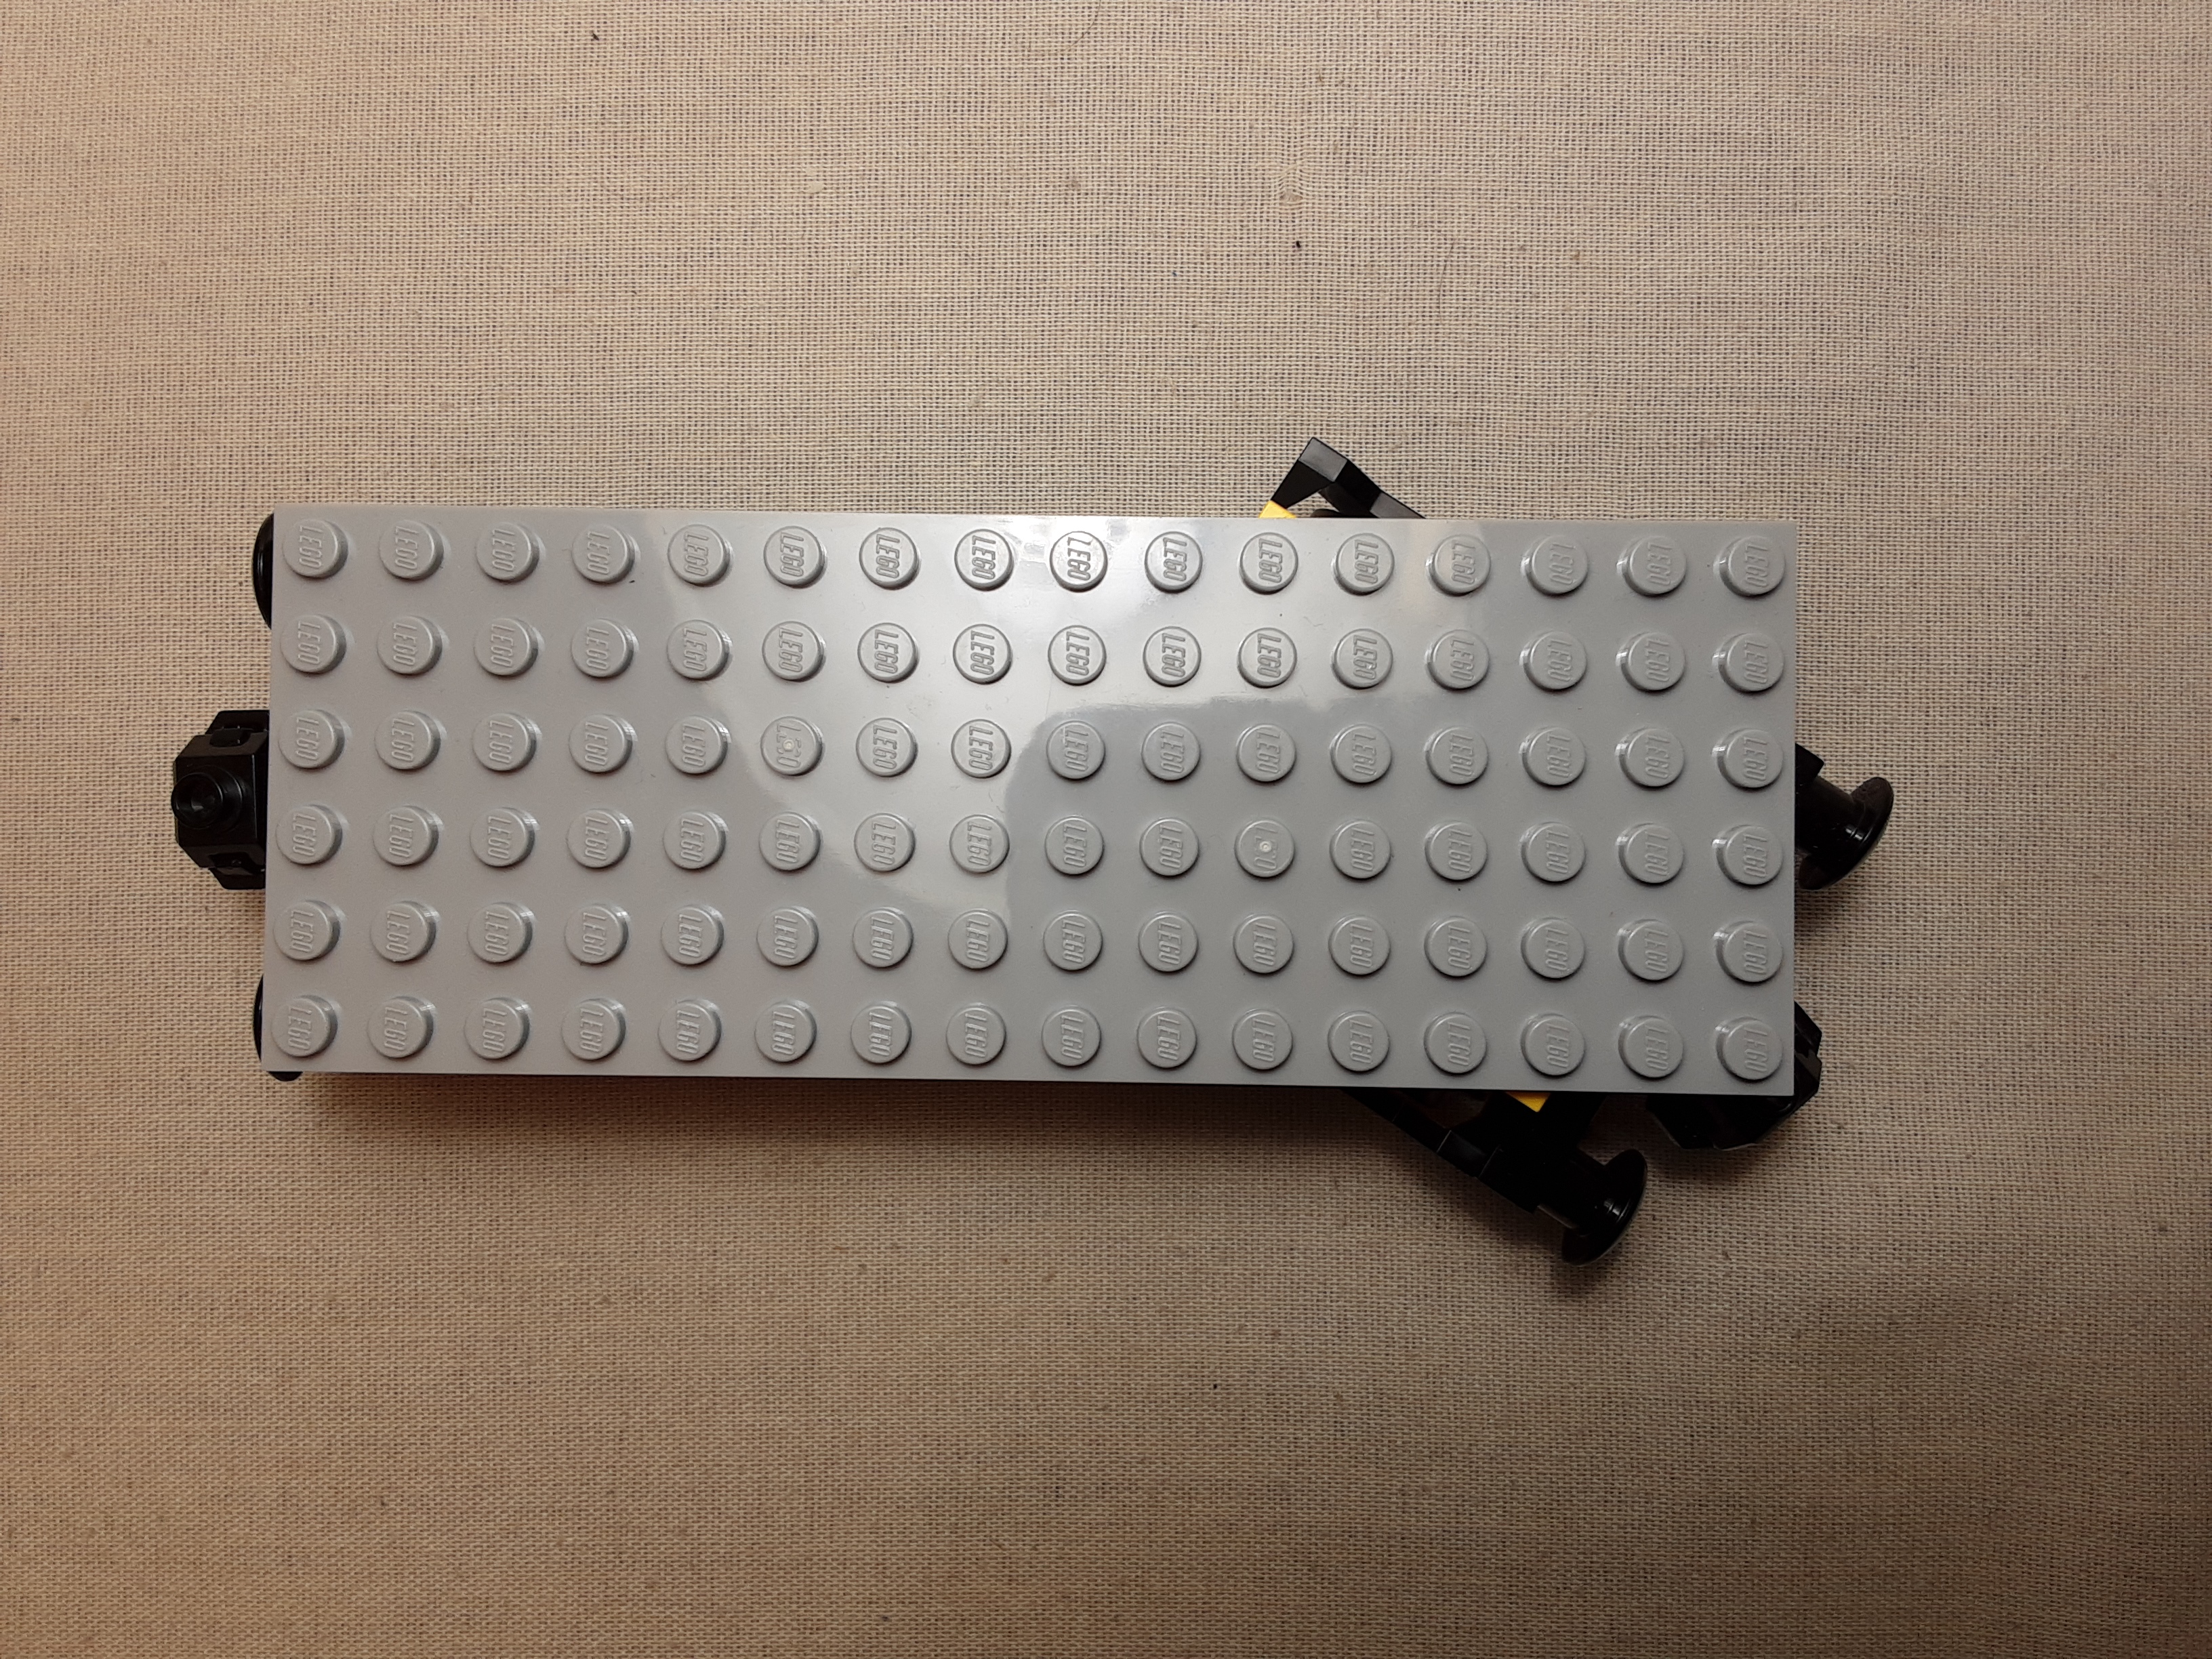
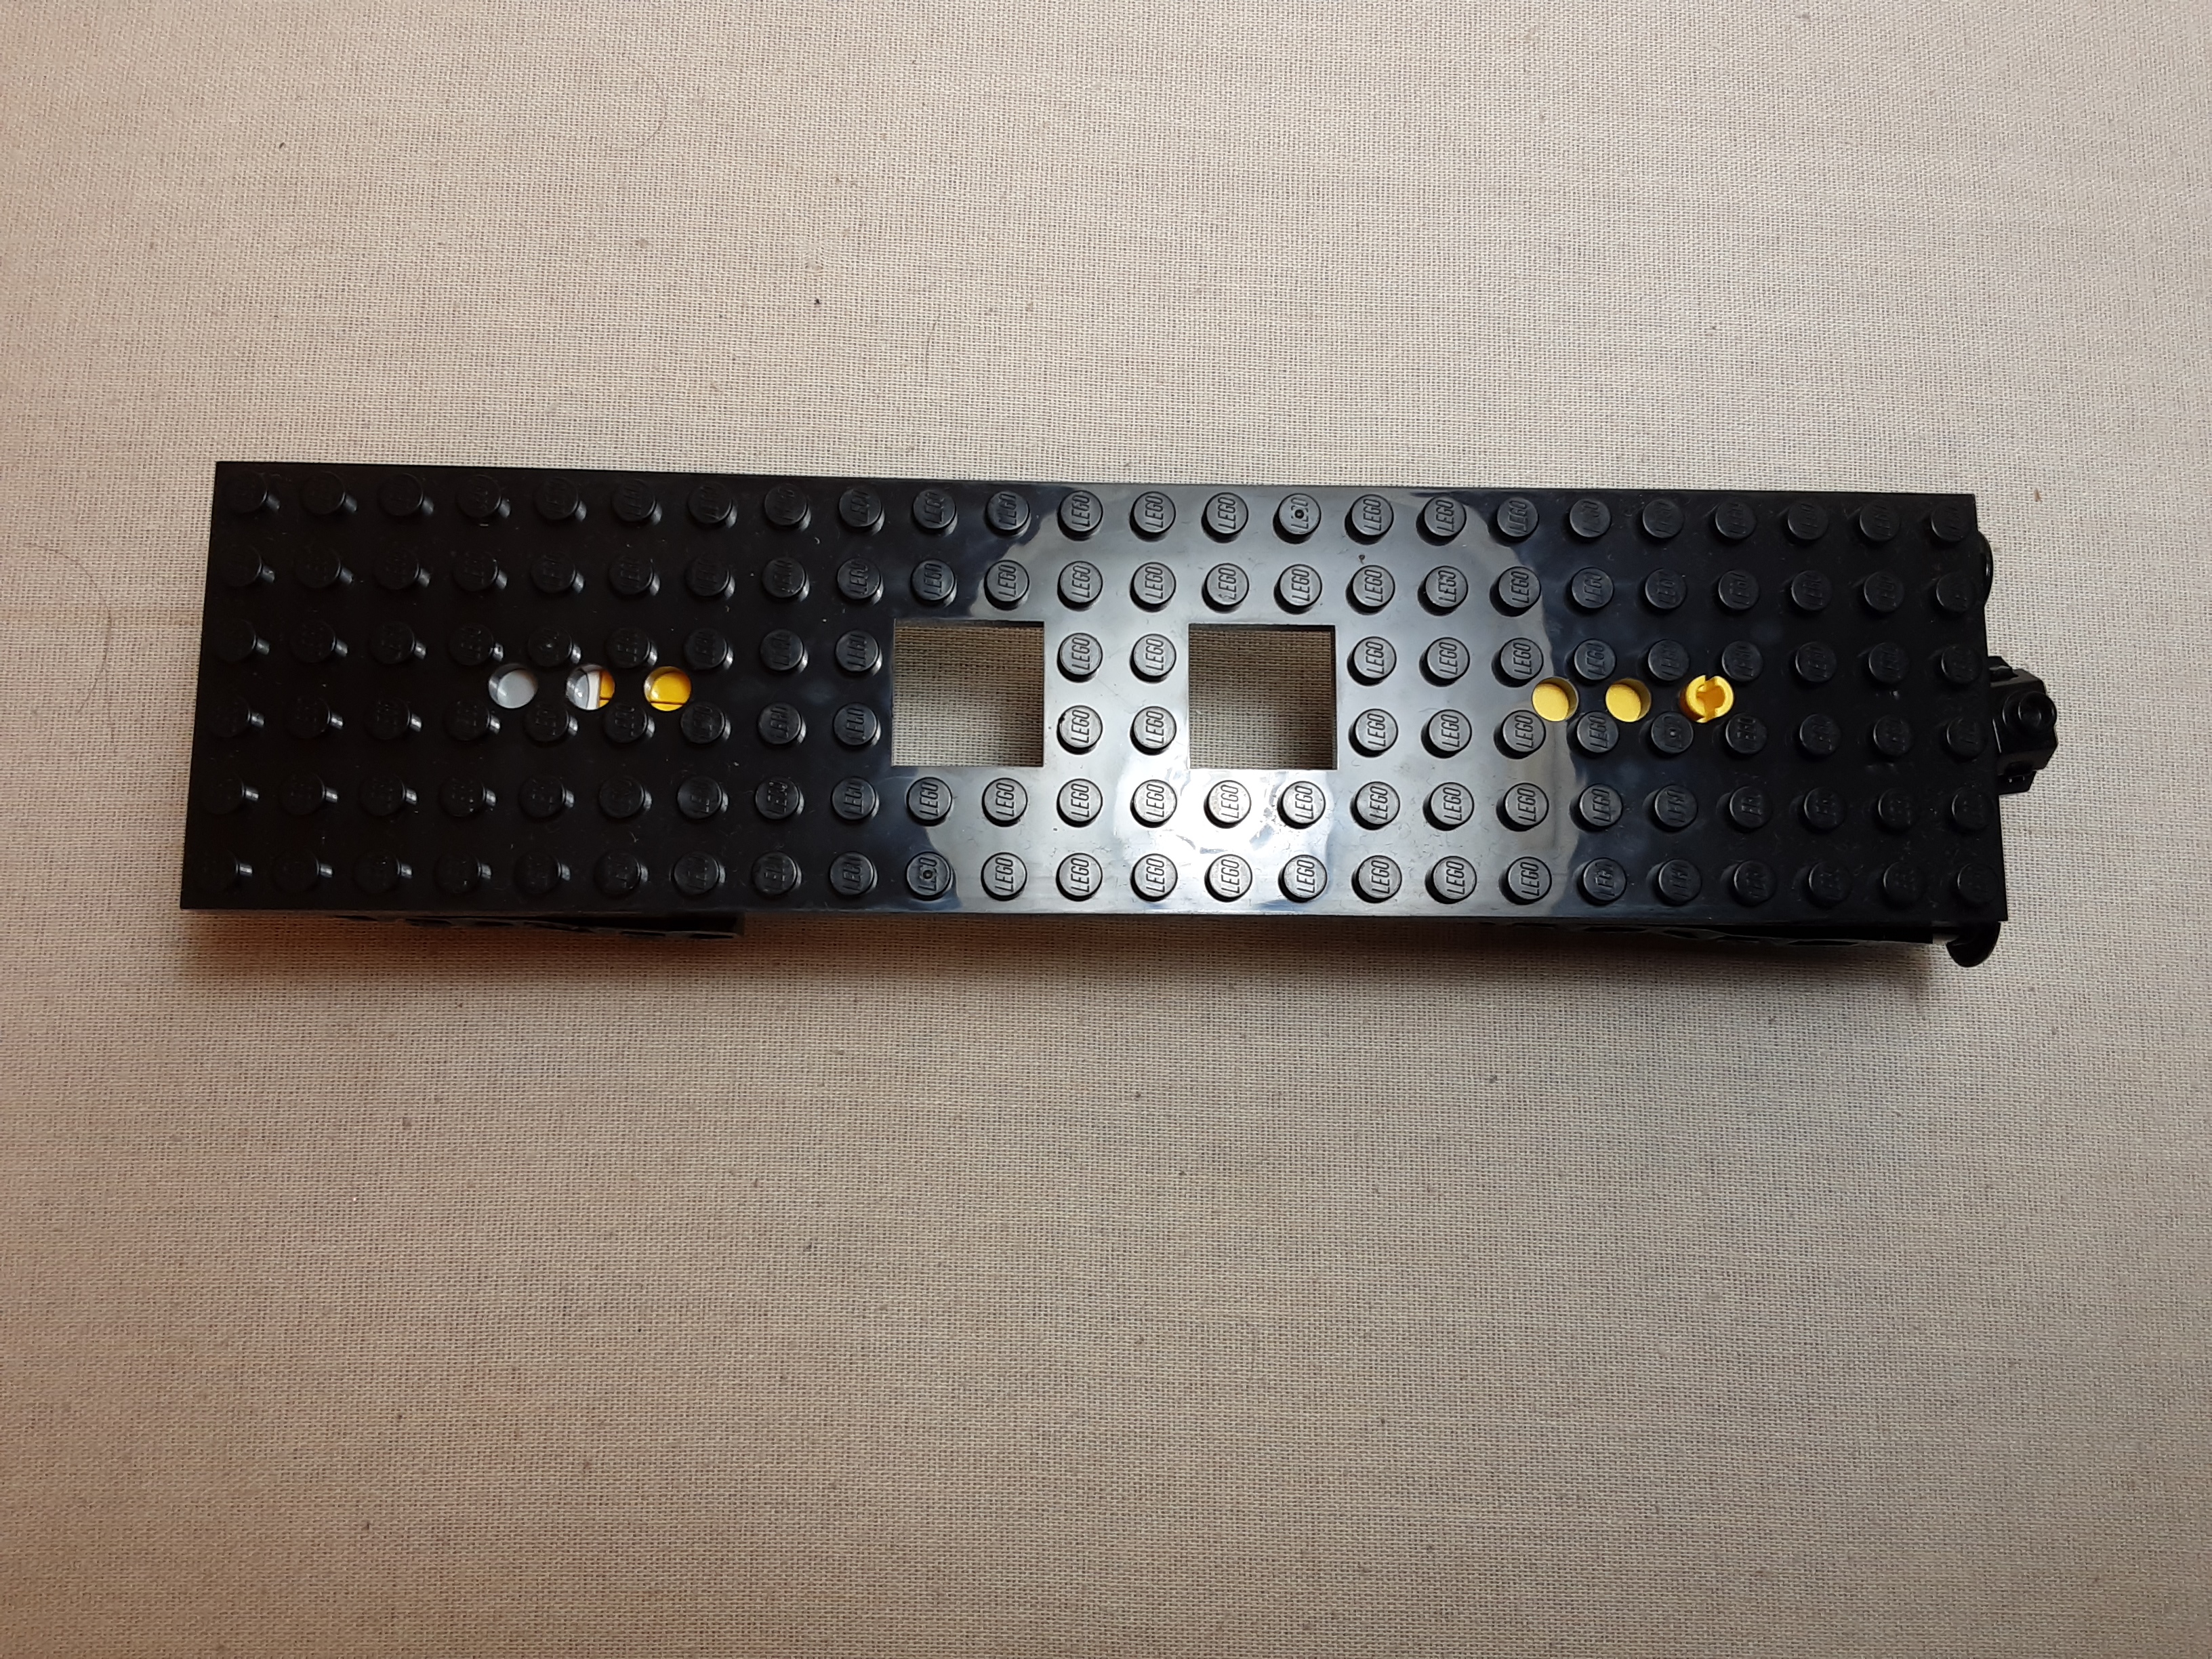
The Train Chassis comes in 2 sizes: a 6x24x2/3 Chassis (ID #92088) and a 6x28x2/3 Chassis (ID #92339). Each has 3 pin holes near the ends of the plate and 2 2x2 holes near the center. The pin holes allow for different placements of a Bogie Plate. The 2x2 holes allow the wire from a motor (which is mounted under the Train Chassis) to be routed above the chassis.
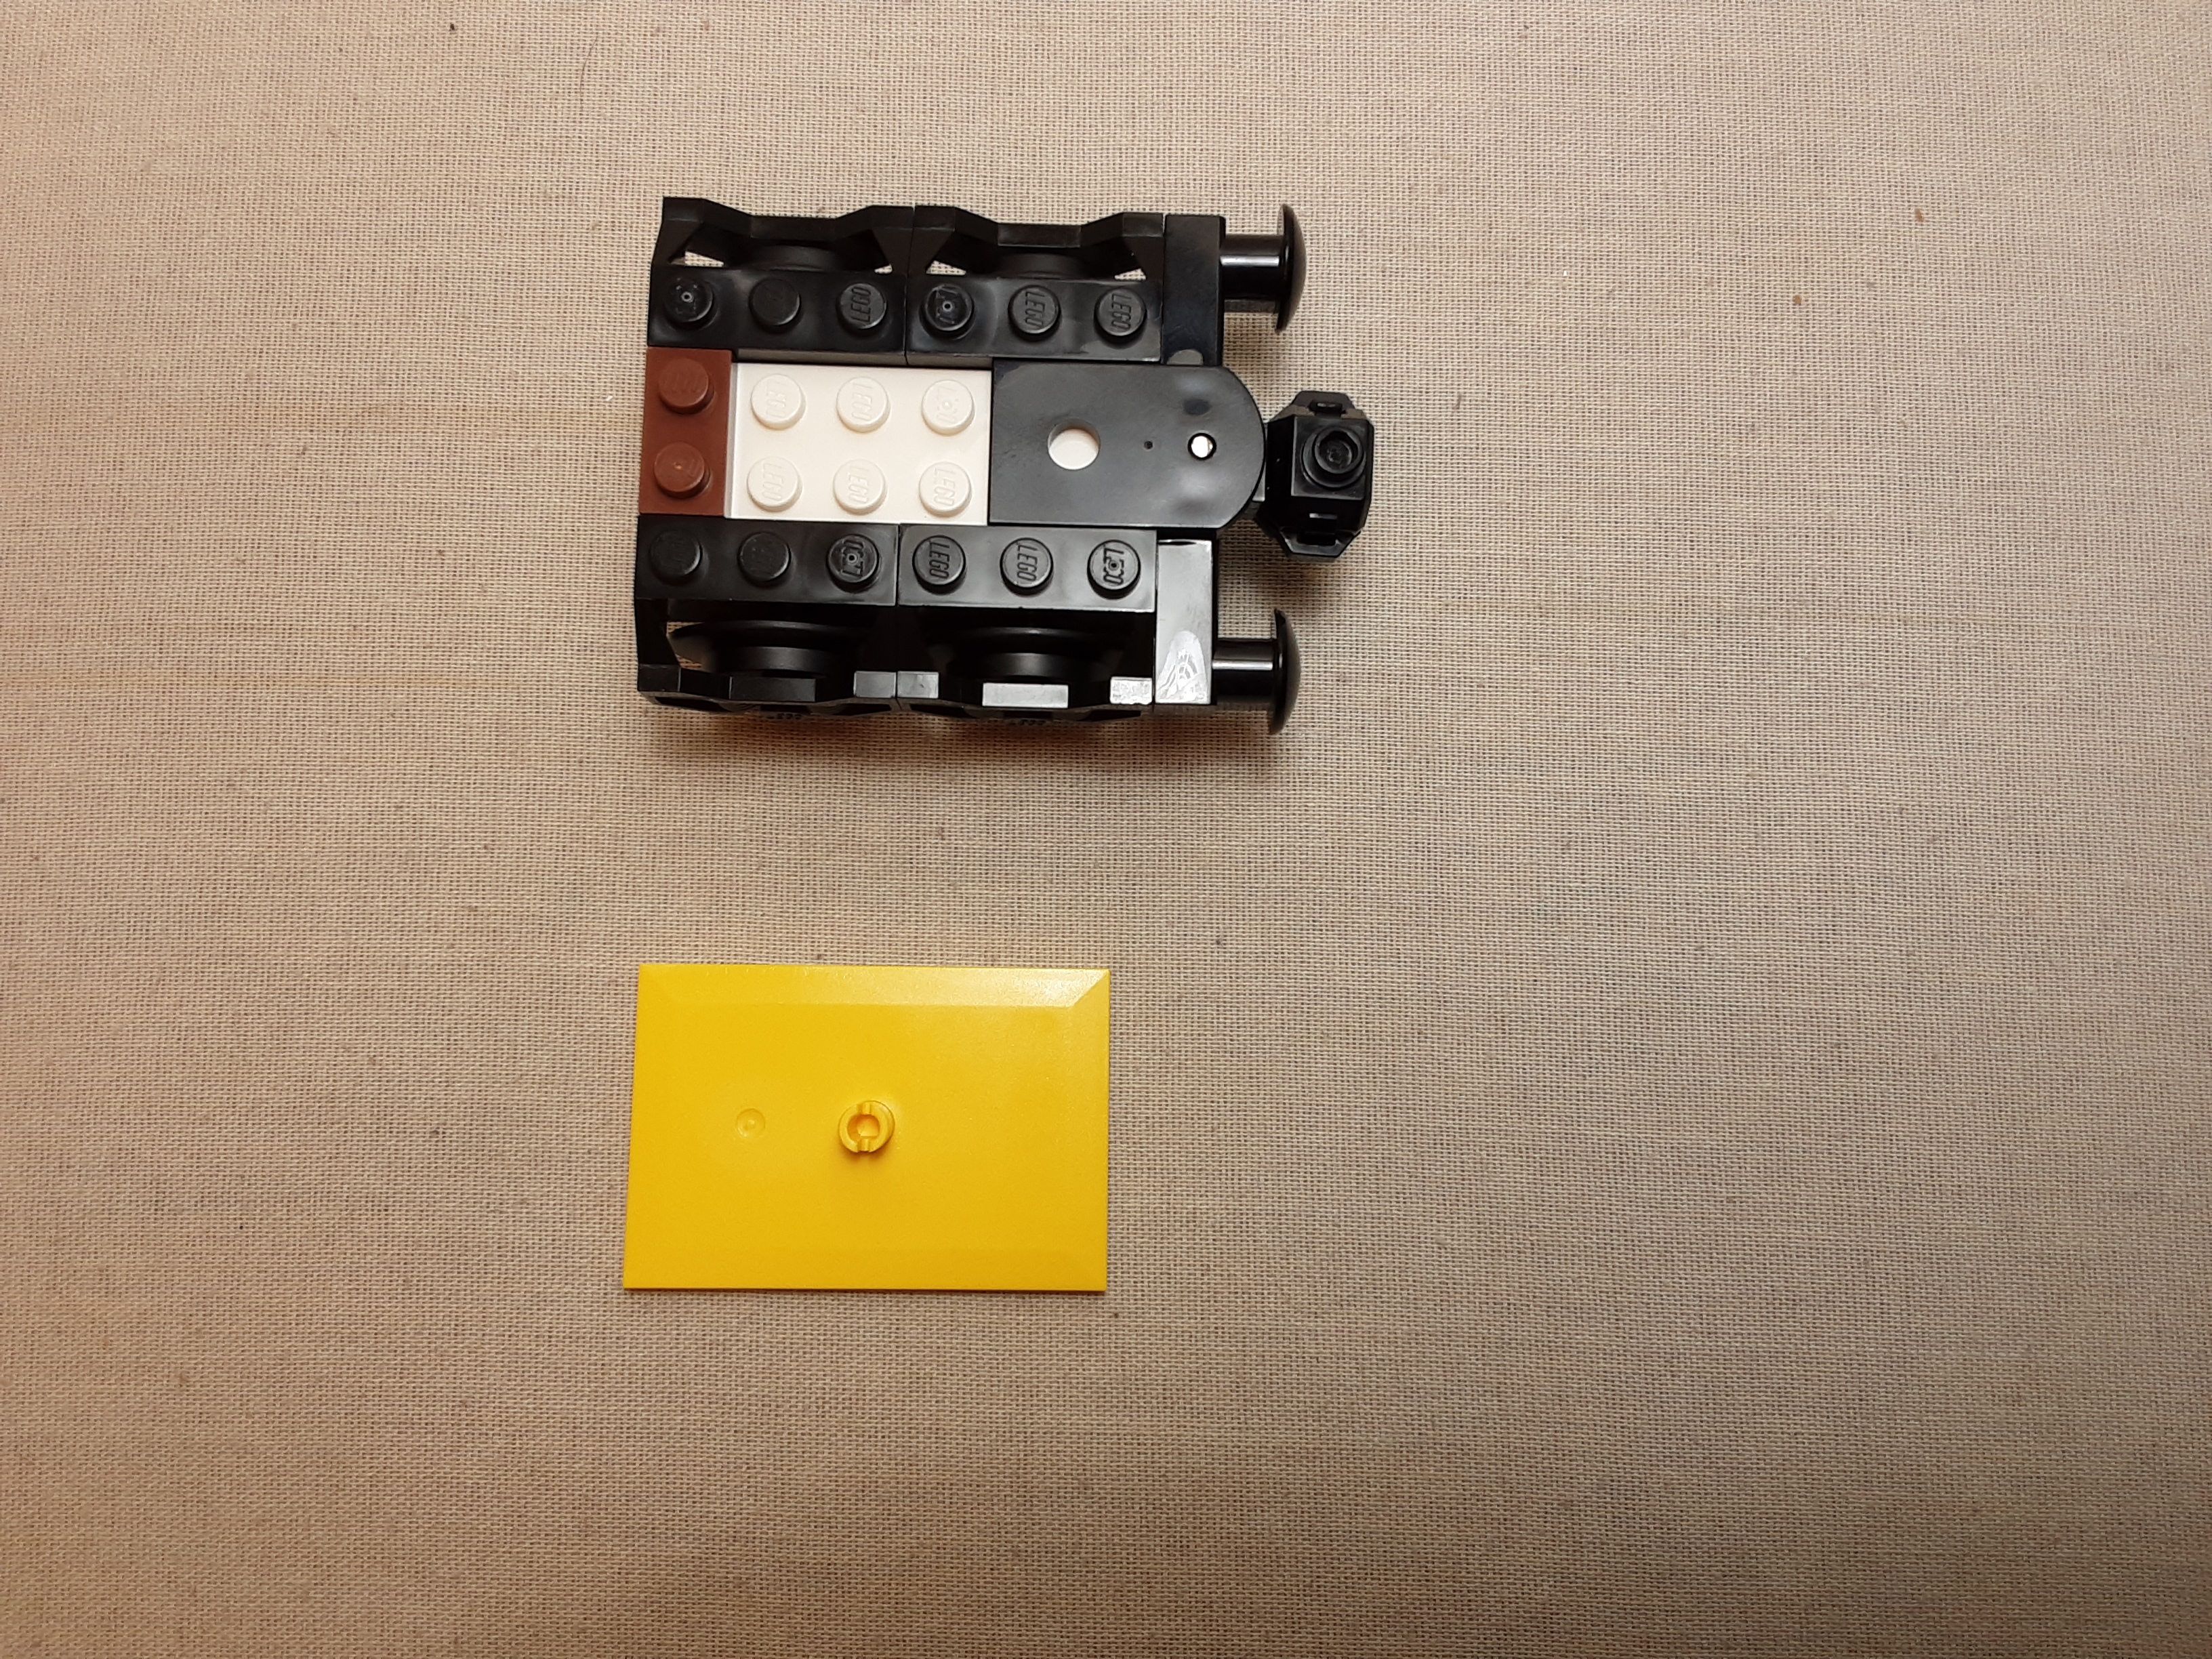
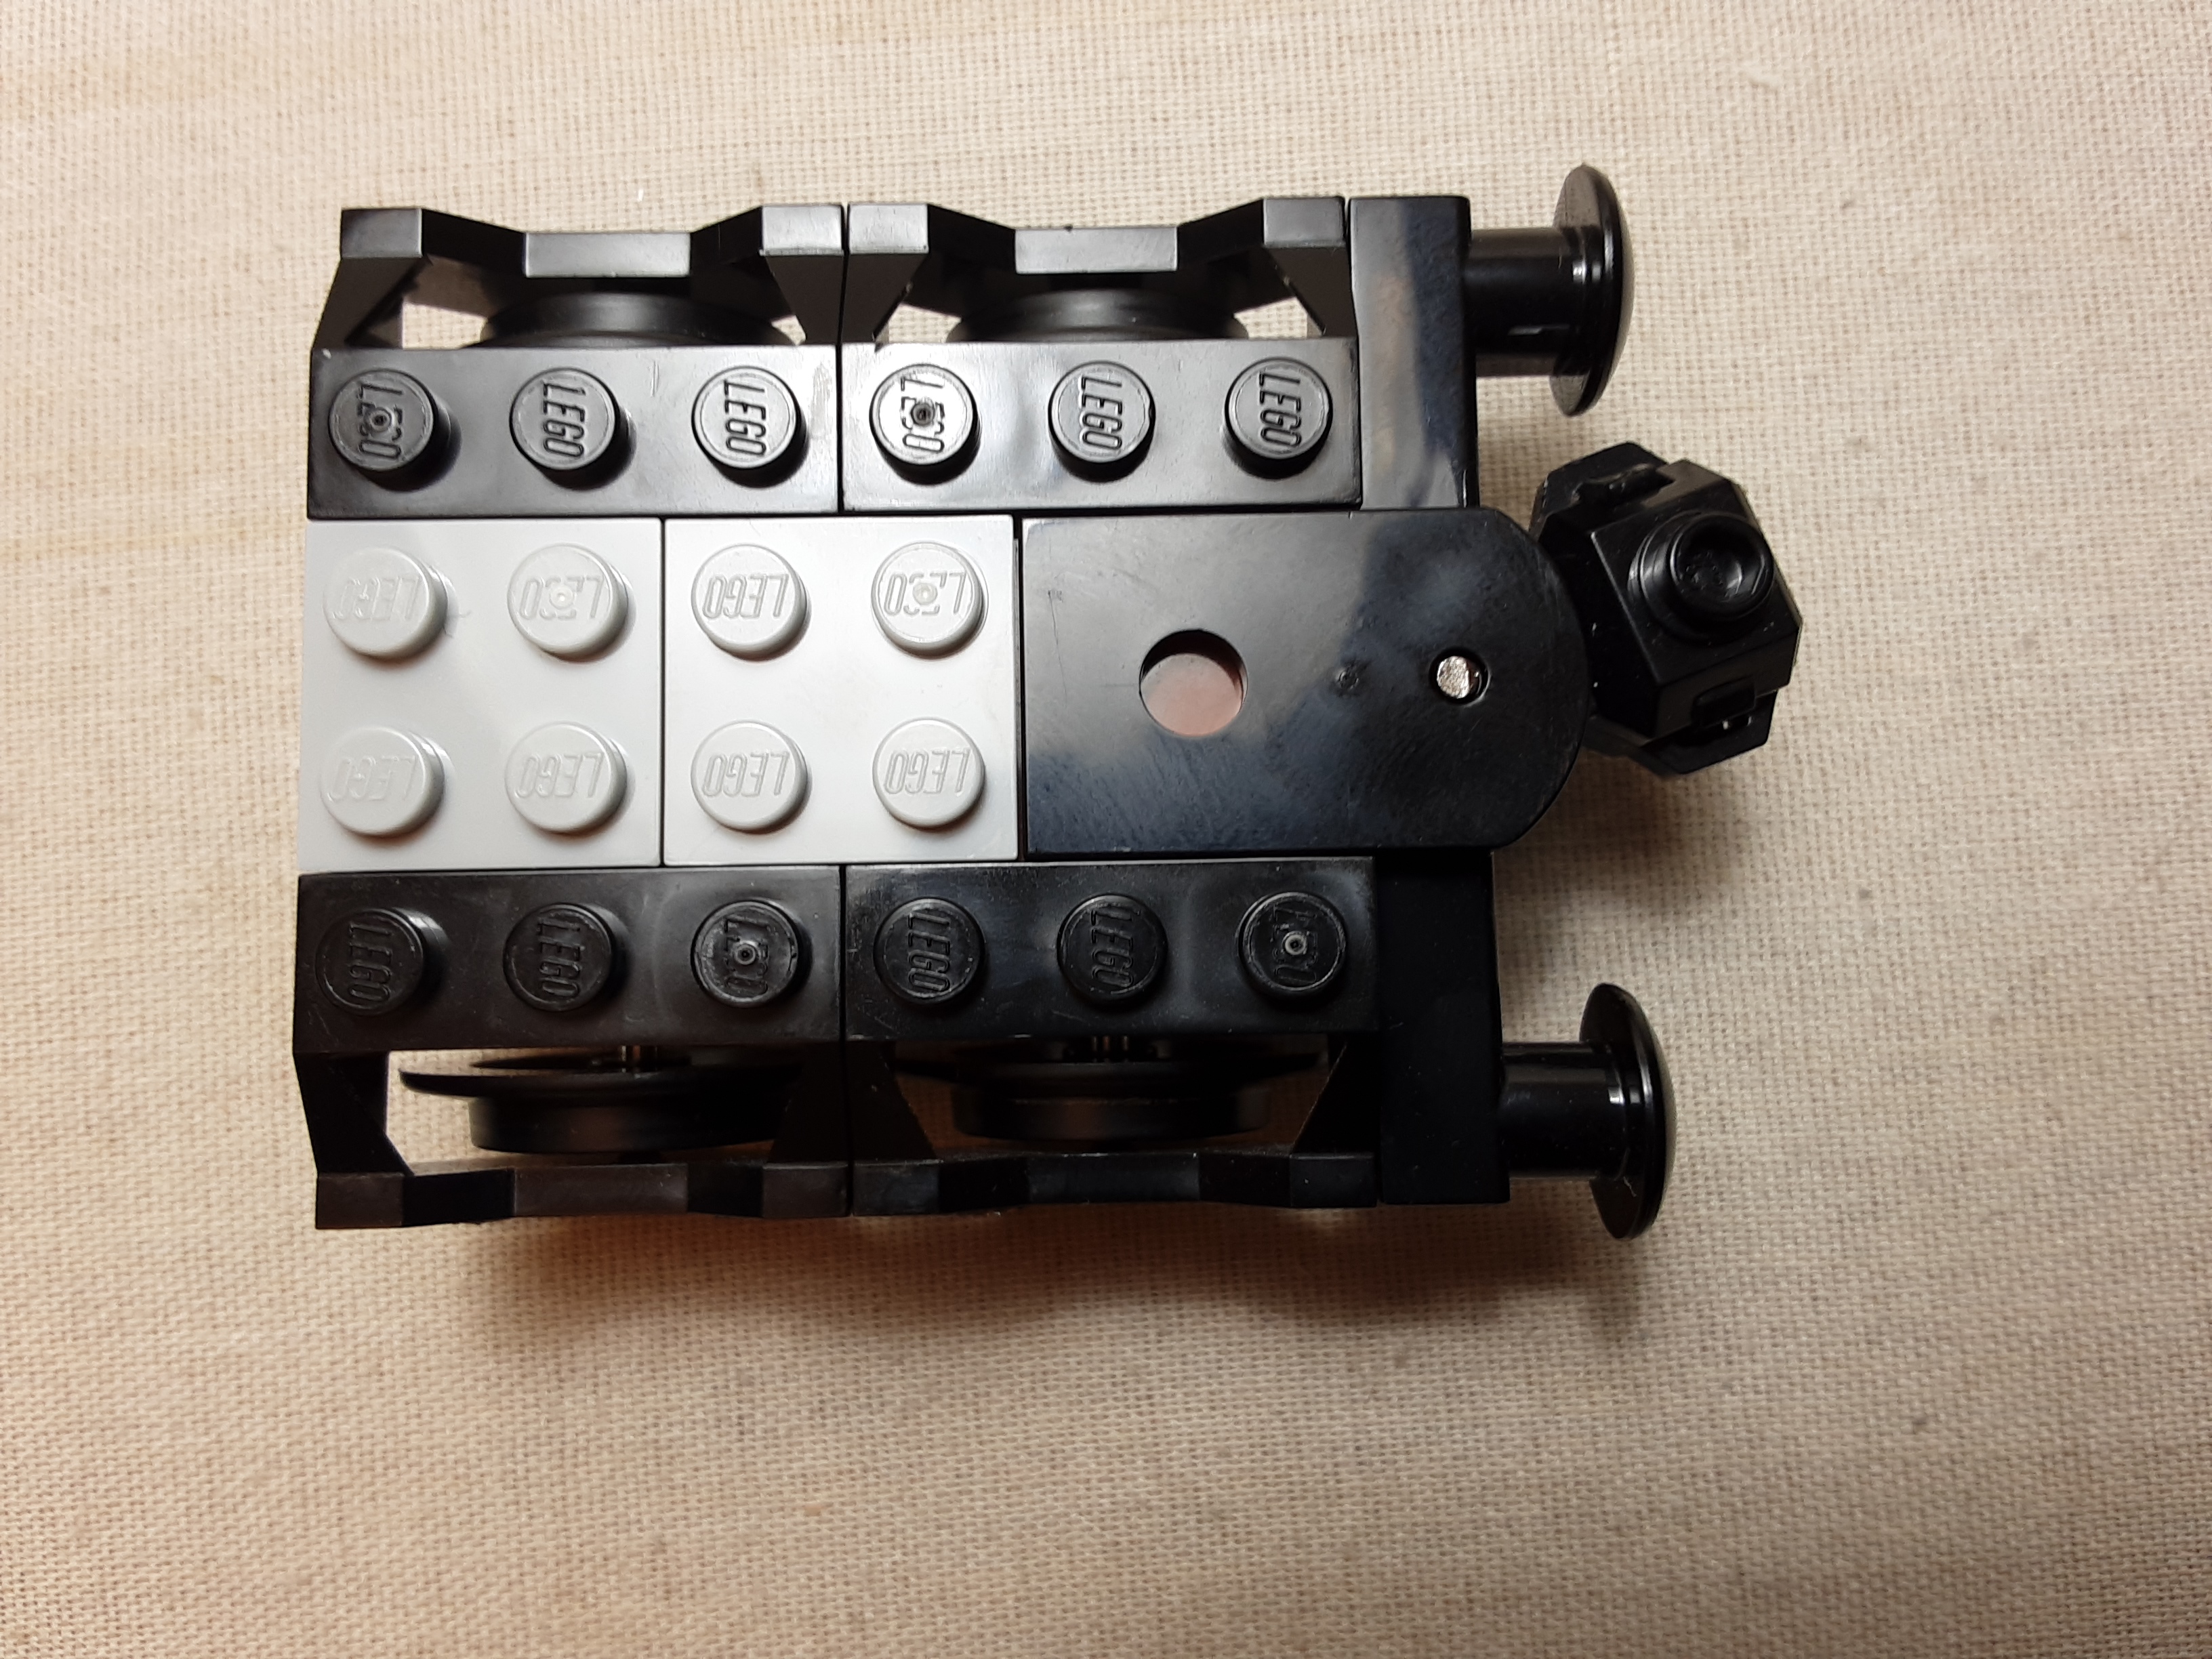
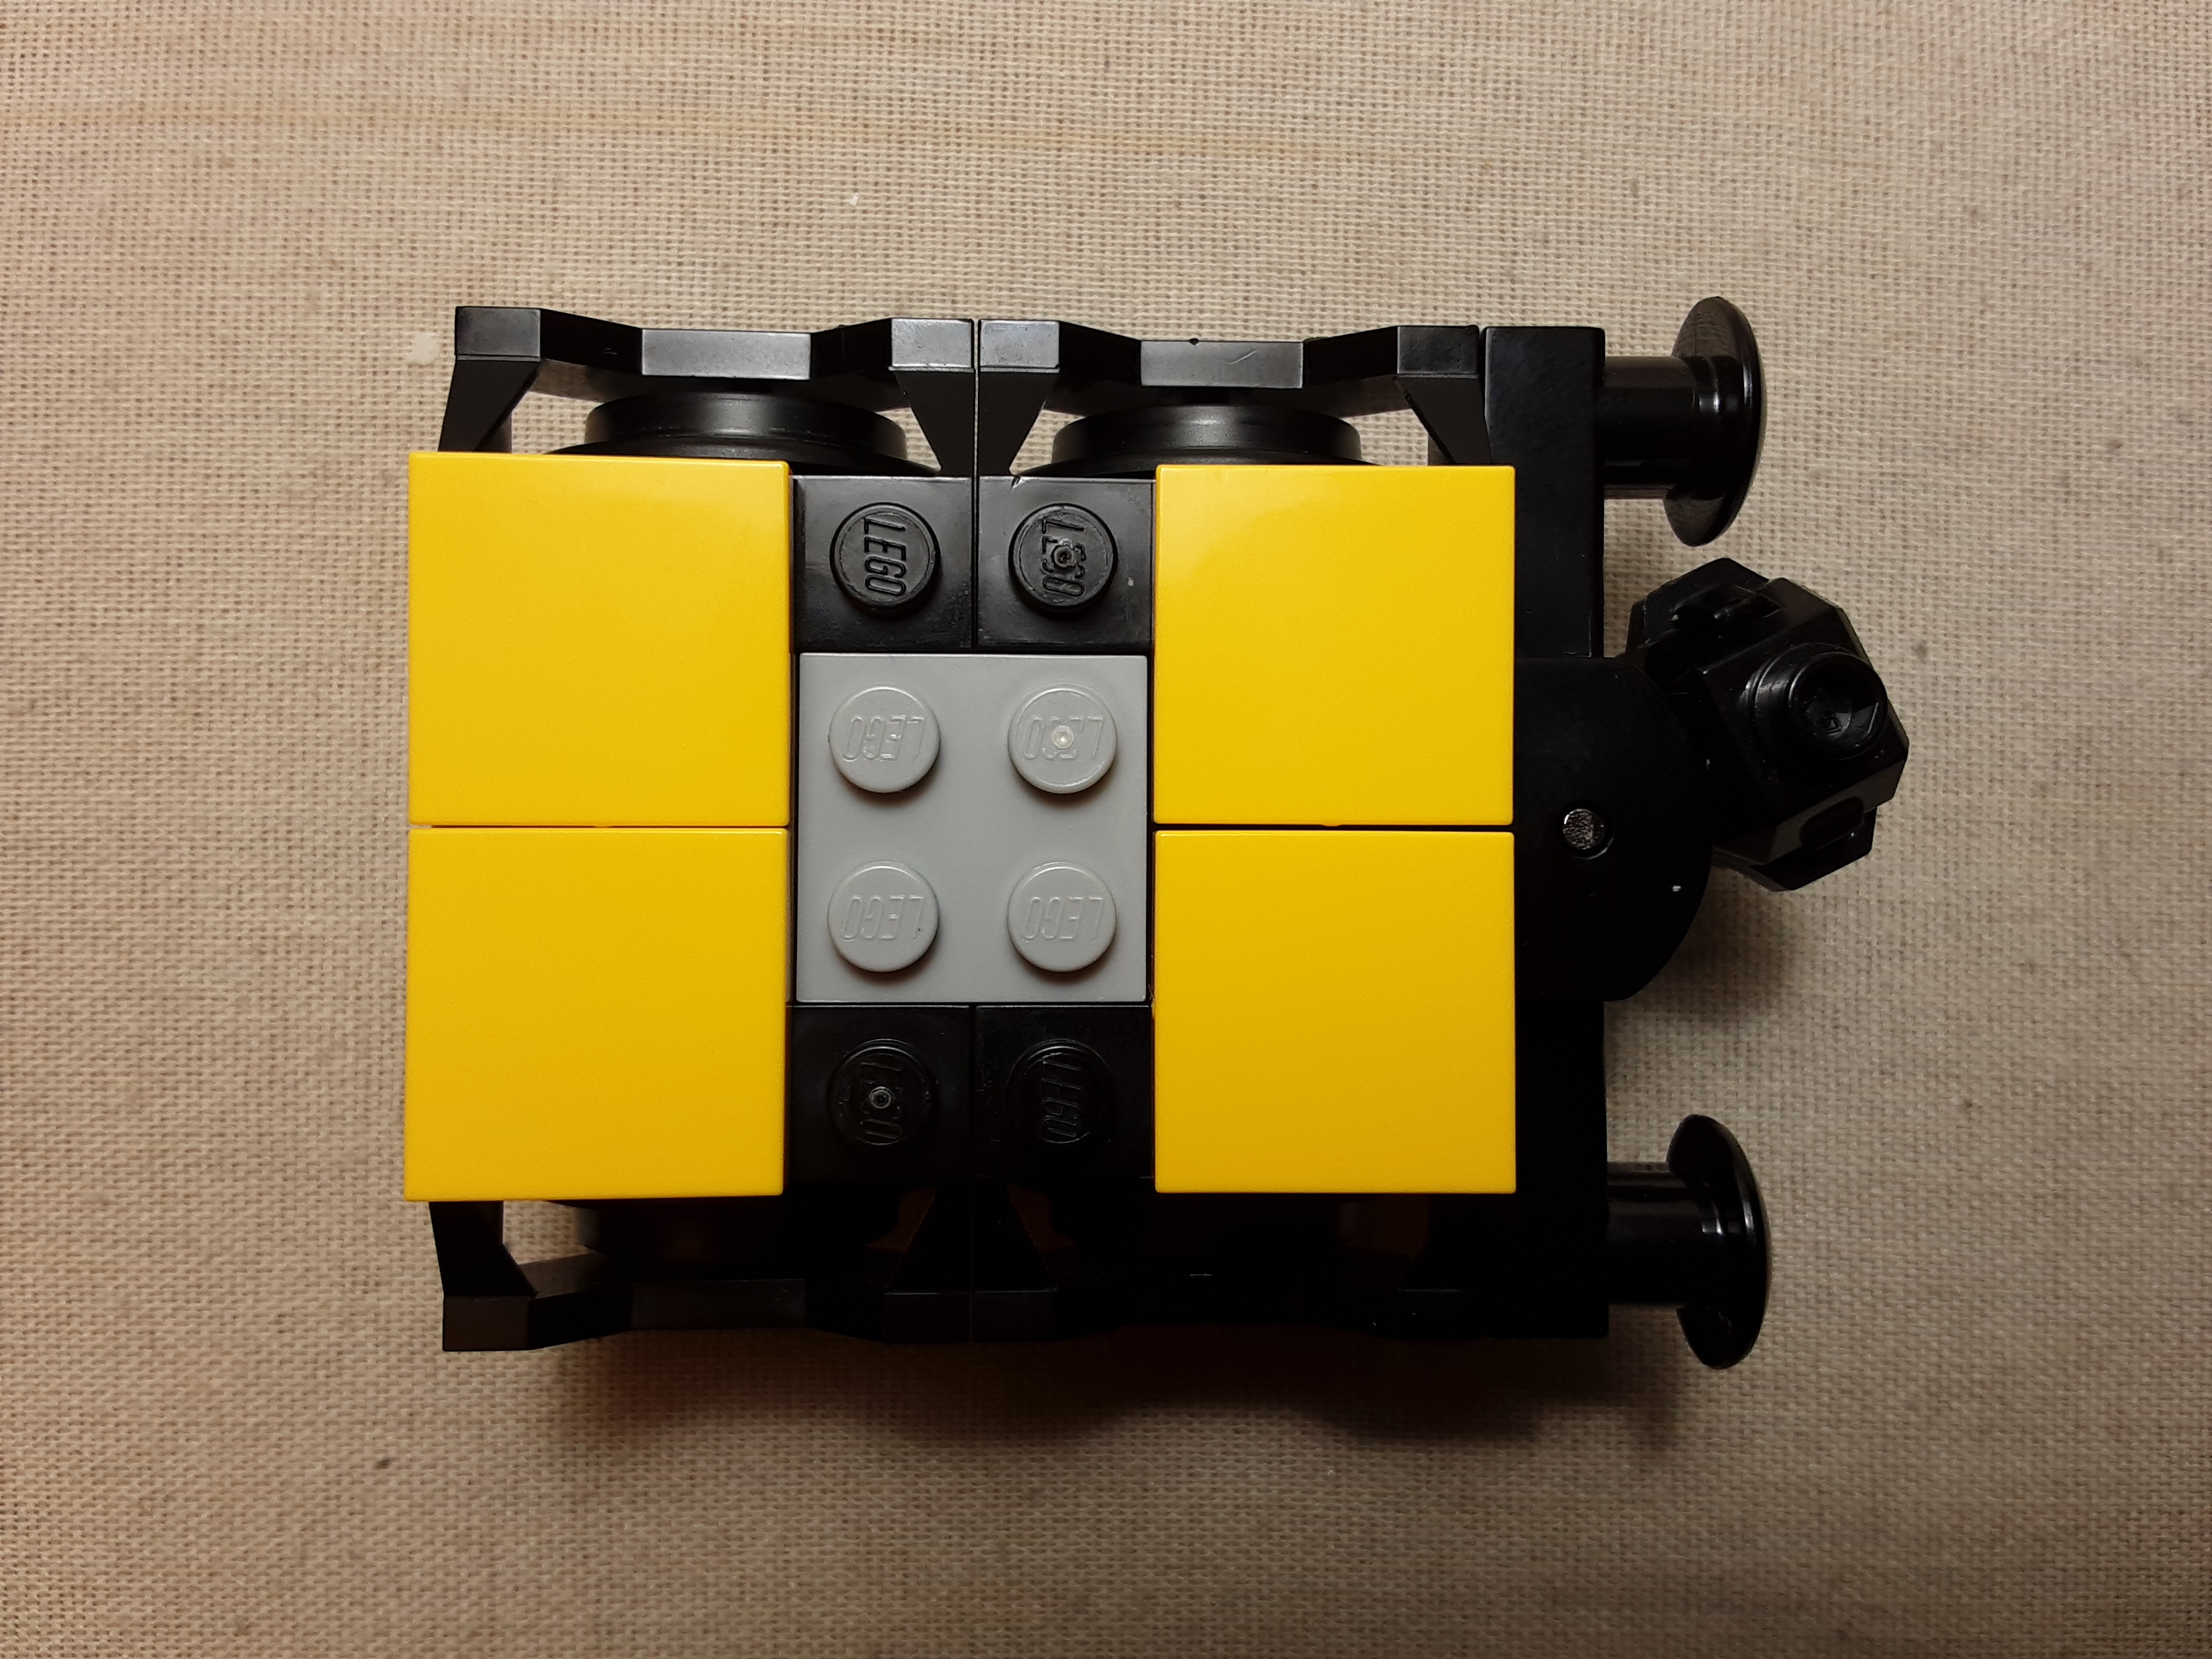
We can modify our wheel assembly builds from the earlier section to use a Bogie Plate instead of a Turntable. Install the wheels/axle pair into the Wheel Housing as before. Connect 2 of these with a 2x6 plate as before (here it is a white 2x6 plate). Install a Coupler at one end of the 2x6 plate as before. We can use either a 1x2 (shown) or a 2x2 plate at the other end of the 2x6 plate.
Now we can put the 4x6 Bogie Plate on top of the wheel assembly. This completes the modification.
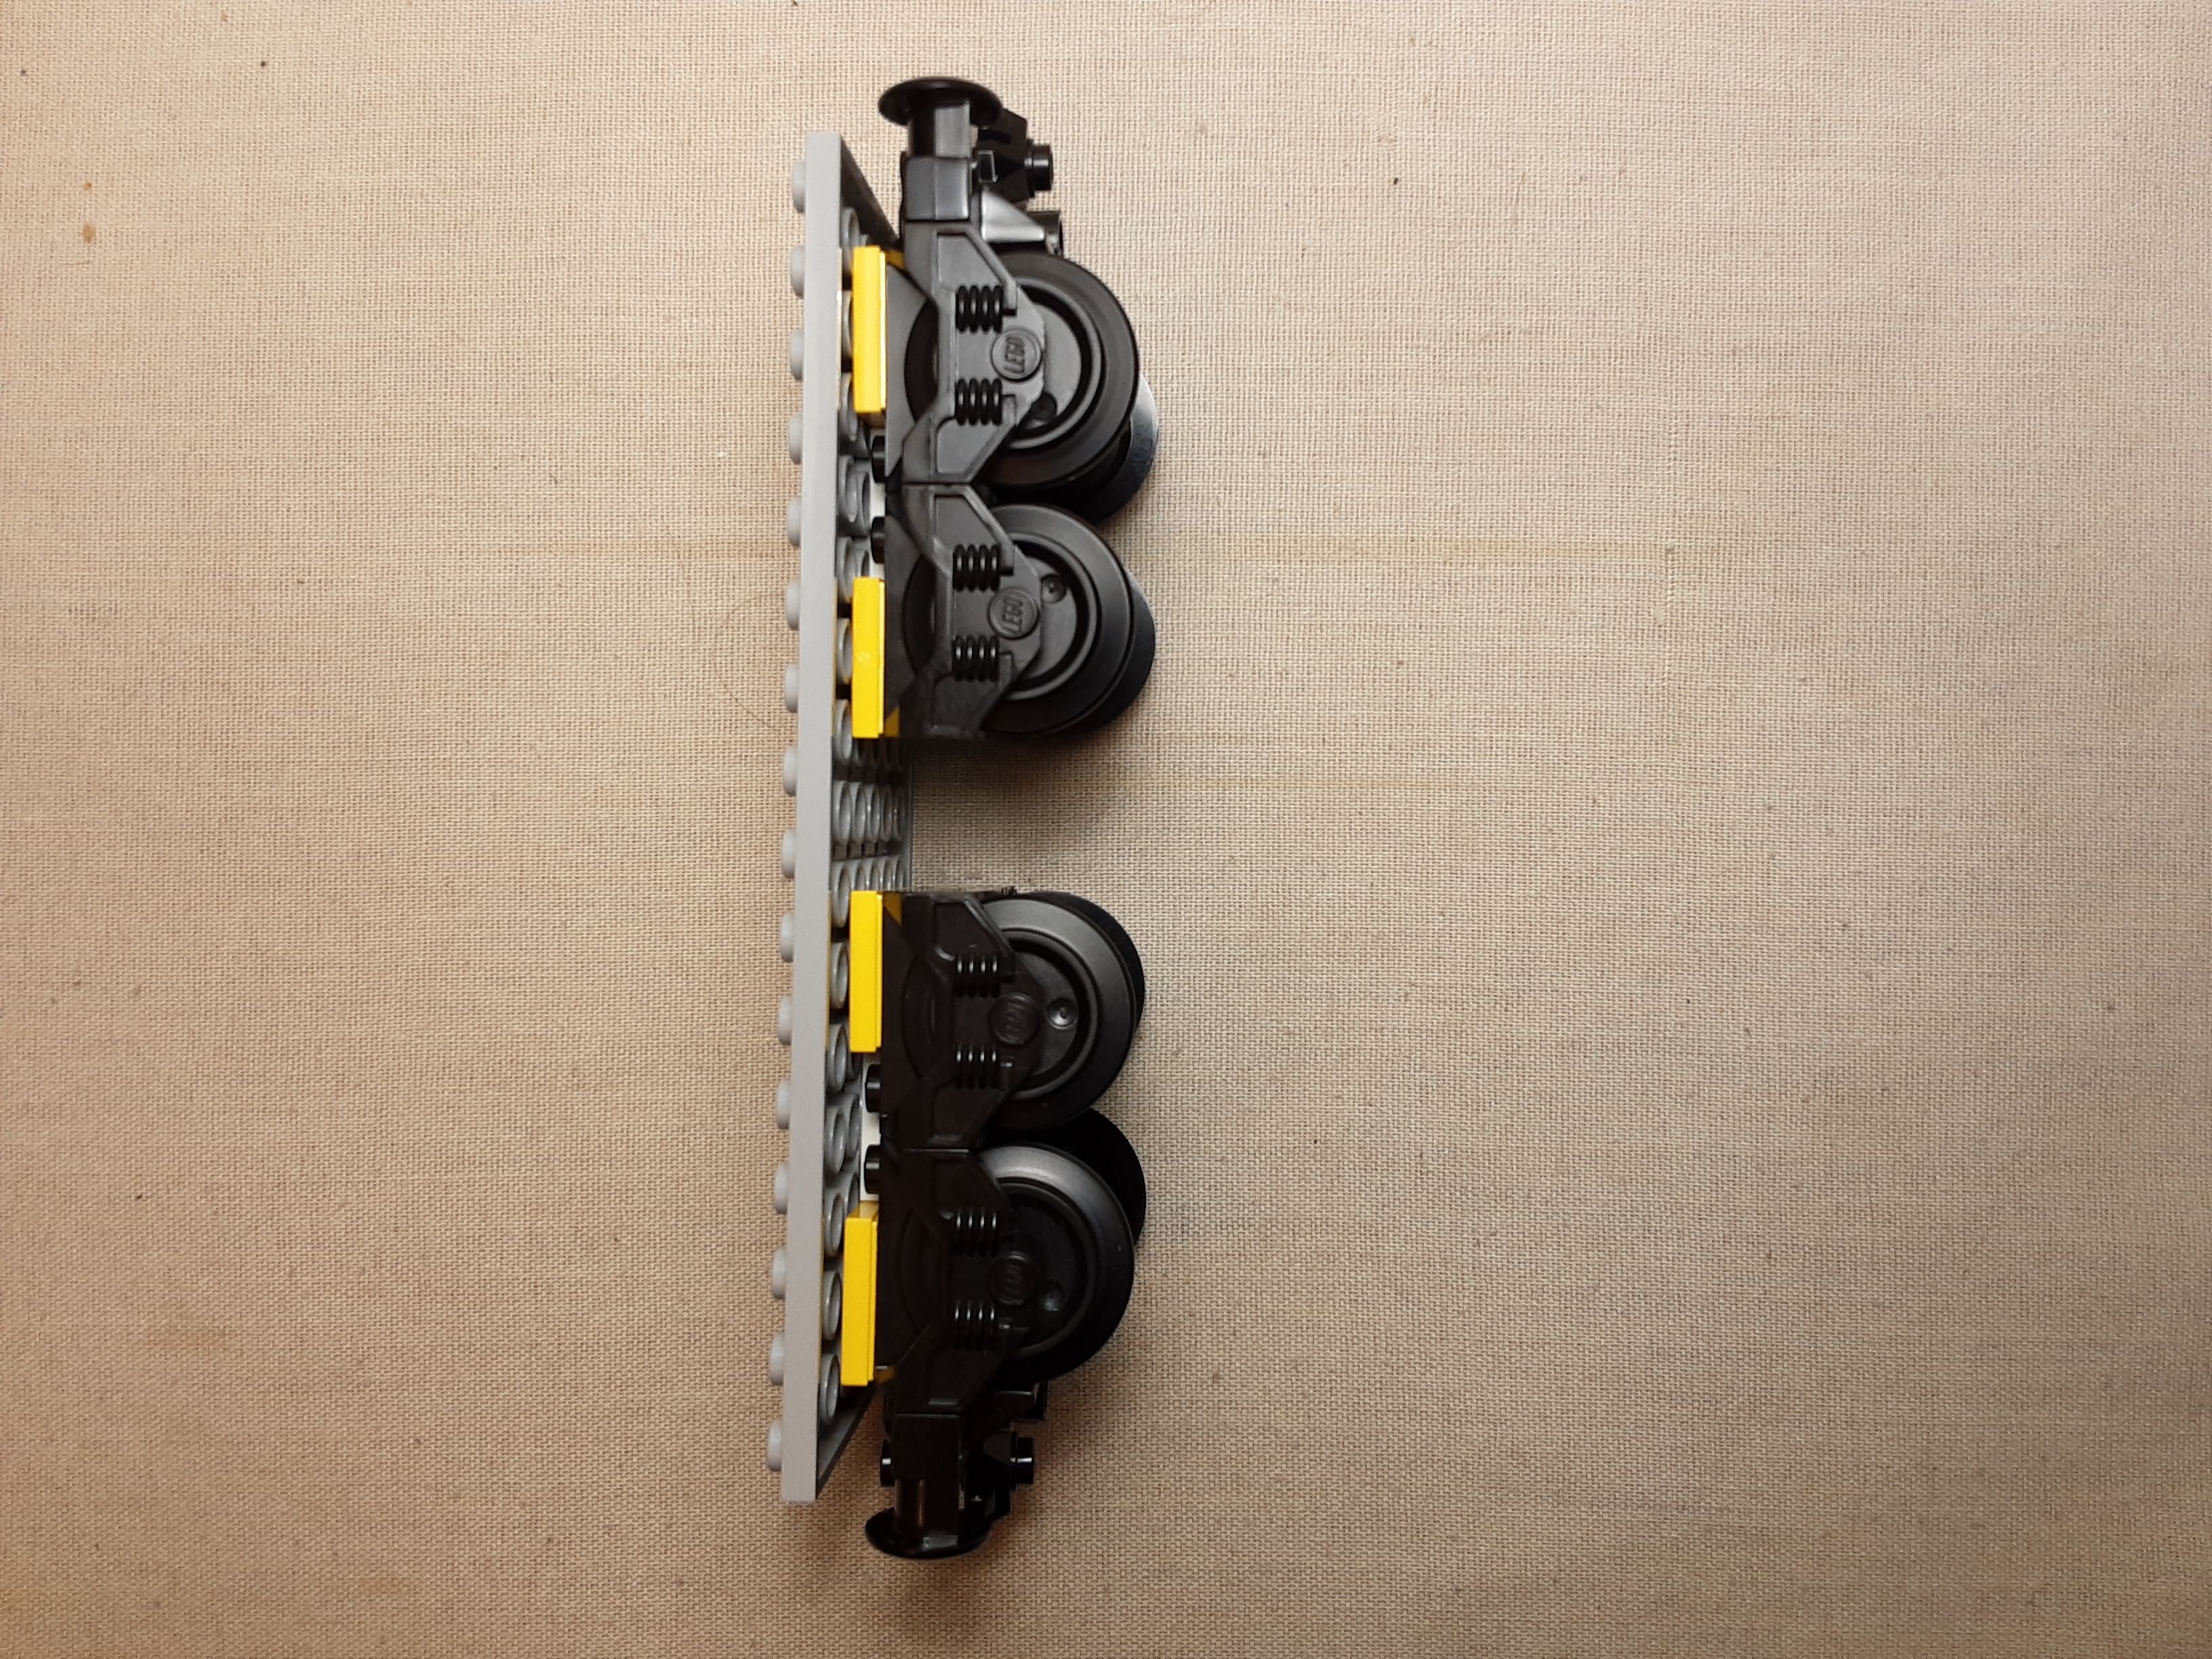
Here a Turntable wheel assembly is mounted at the left end of the Train Chassis and a Bogie Plate wheel assembly is mounted at the right end. This shows the difference in the mounting style.
Placing the pin of the Bogie Plate in the hole closest to the end of the Train Chassis works well for a wheel assembly with a Coupler in place as shown in previous examples.
Adding an engine:
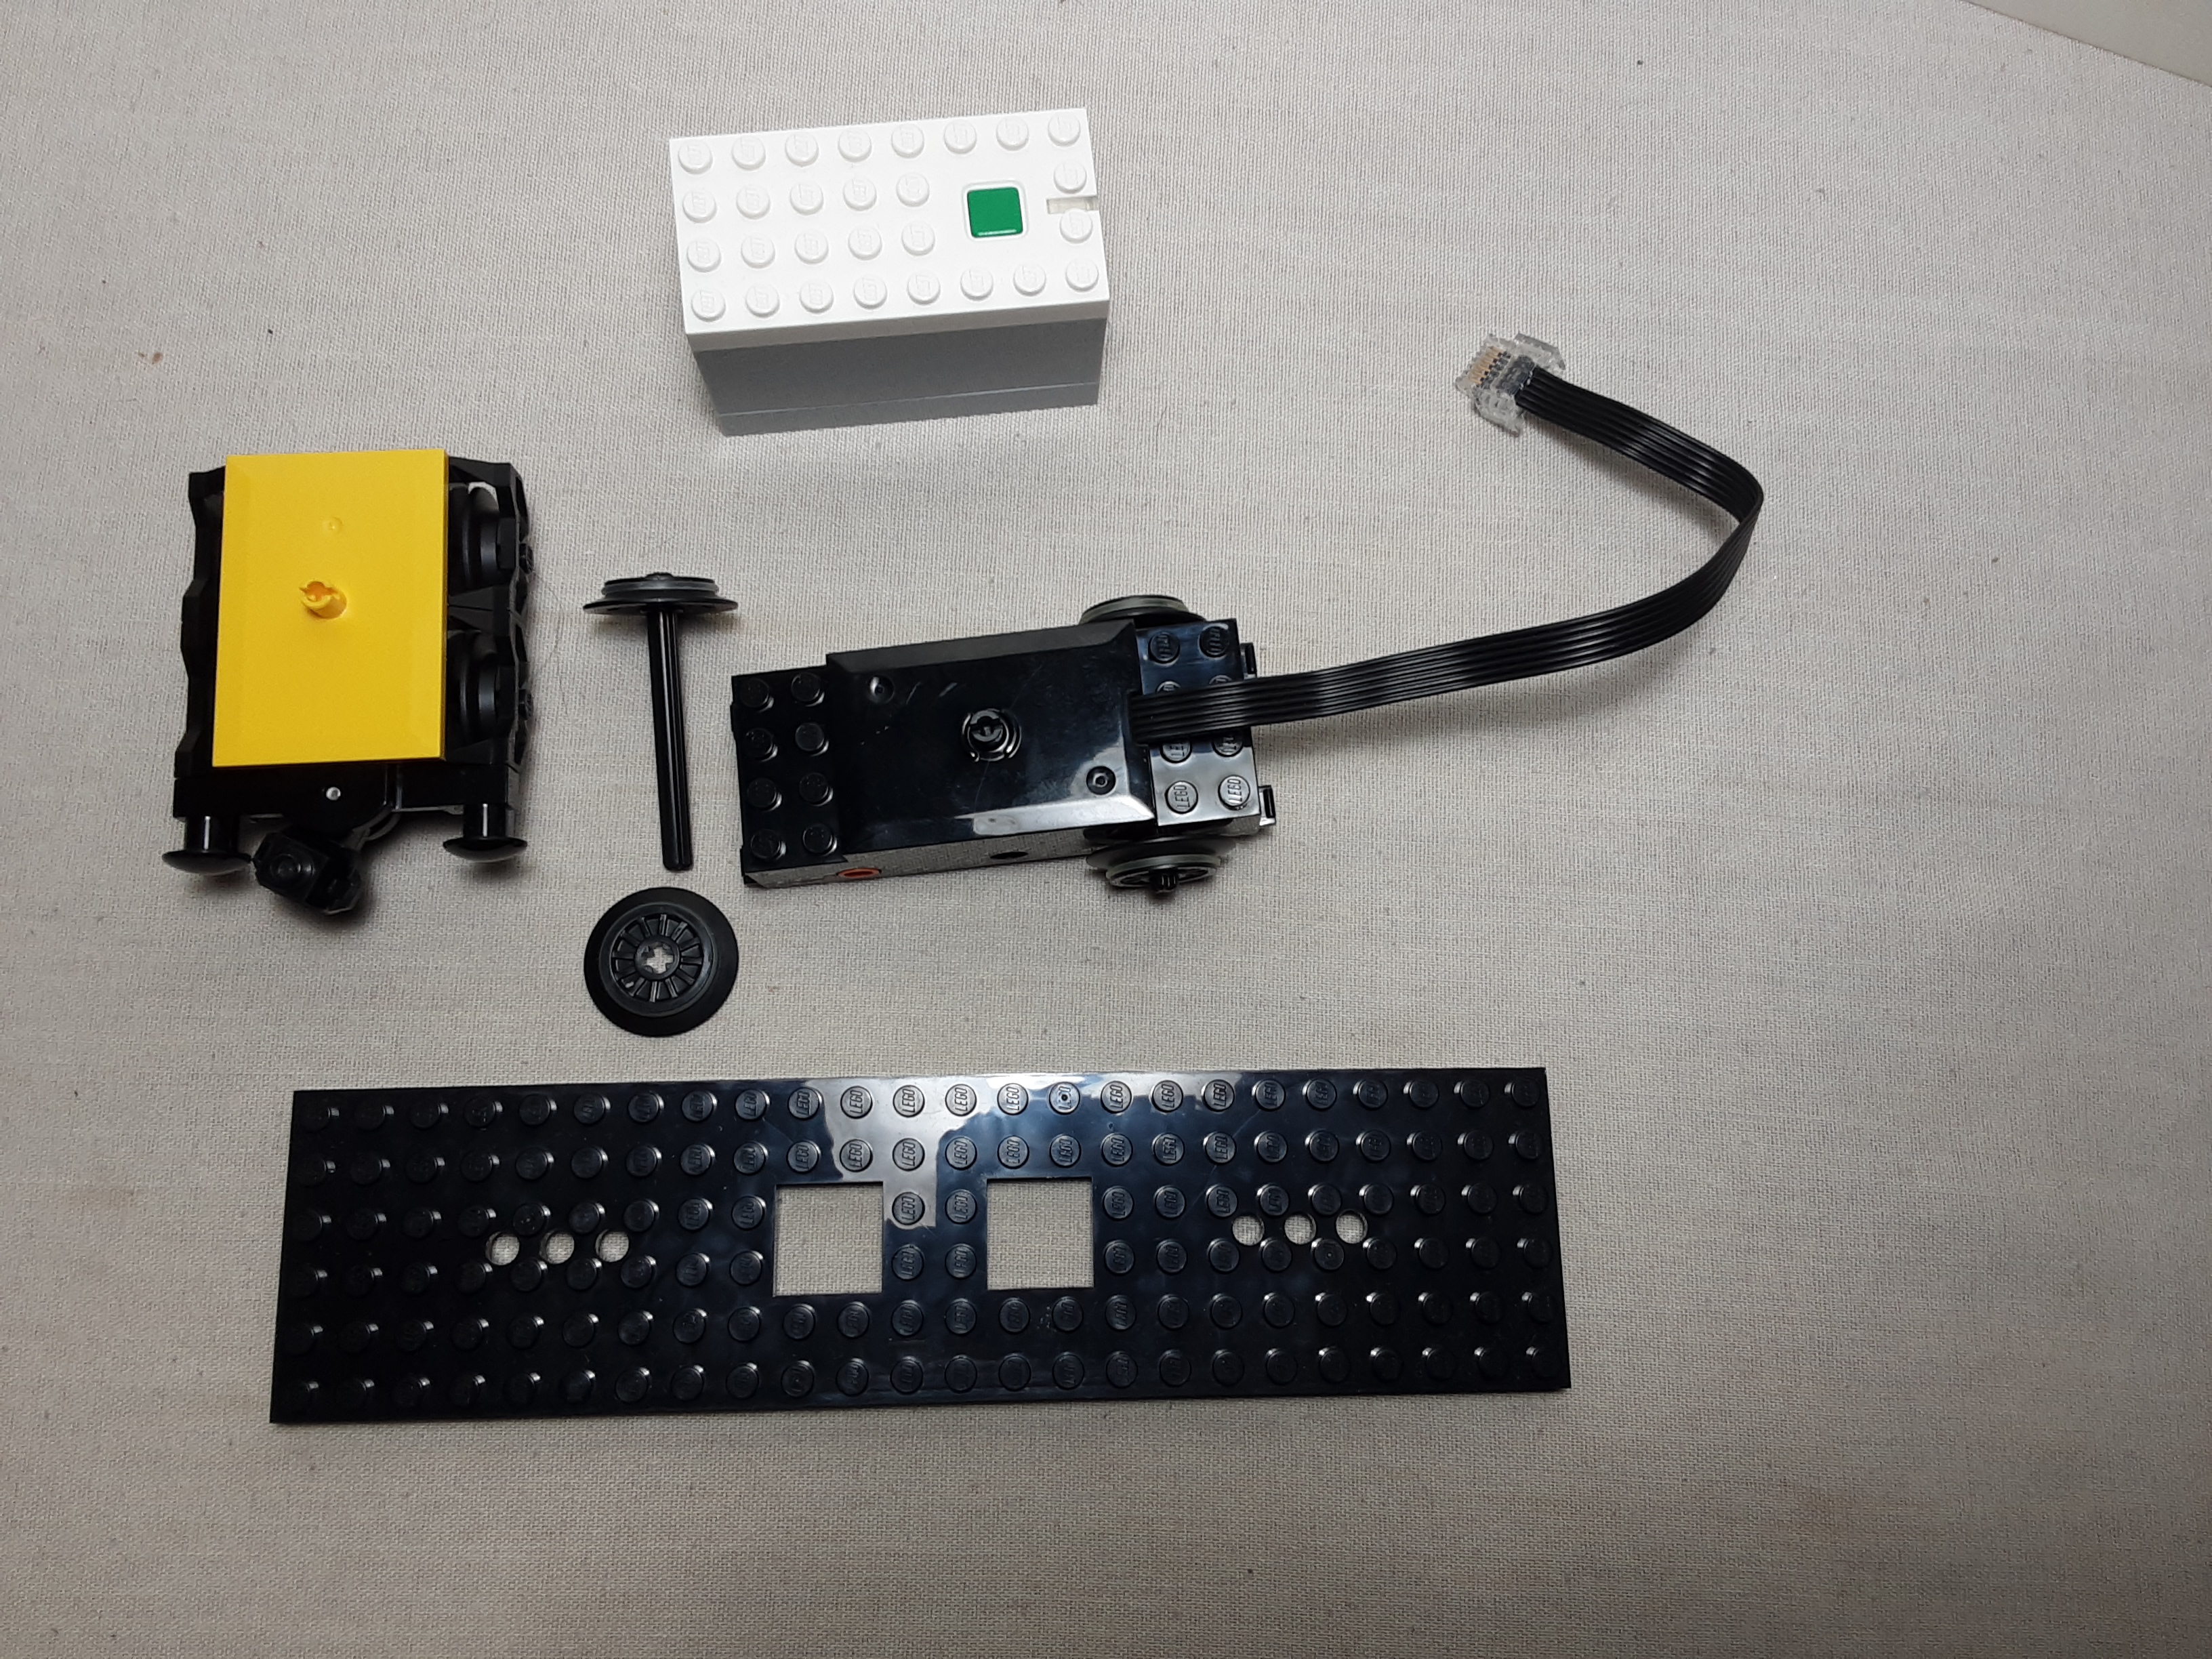
In order for your train to move on its own, it needs a motor, a battery pack,
and a controller. Lego used to use the Power Functions
system, but now
uses the Powered Up
system. The Powered Up
system uses a 'Hub' (top of
image) which is a battery pack and controller in one unit. The Hub can receive
commands from a remote control as well as a program code from the Lego App.
The same concepts of building a simple train car above also apply to making
a train engine. The biggest difference is that the motor and hub must also
be mounted to the bed plate and there must be holes in the bed plate to
allow wiring to pass through it. So usually an engine is built using the
Train Chassis and Bogie Plate described in the section above. This easily
handles the extra weight of the Powered Up
components and the pressure
created by the motor pulling many train cars behind the engine.
When you purchase a Powered Up
Train Motor (Set #88011) from Lego, it
comes with the 4 wheels (ID #4621116, Design #55423c01) and 2 6L axles
(Design #3706) required to build it. It also has a Bogie Plate on top
so it can be mounted below the Train Chassis. Simply insert the axles
through the axle holes in the Train Motor, then attach the wheels
(largest side toward the motor body) to the end of the axles. There
should be a gap between the wheels and the motor body. The axles should
just slightly extend beyond the outer edge of the wheels.
If the Train Motor also comes with 2 Train Wheel Covers (ID #4493326, Design #39886 or #2871b), you can install them on the Train Motor. If it is not included with the motor, you can purchase them if desired.
You can optionally install a Coupler to the studs at the front end (not the end with the wire) of the motor. This is not required as most engines pull the train cars instead of push them.
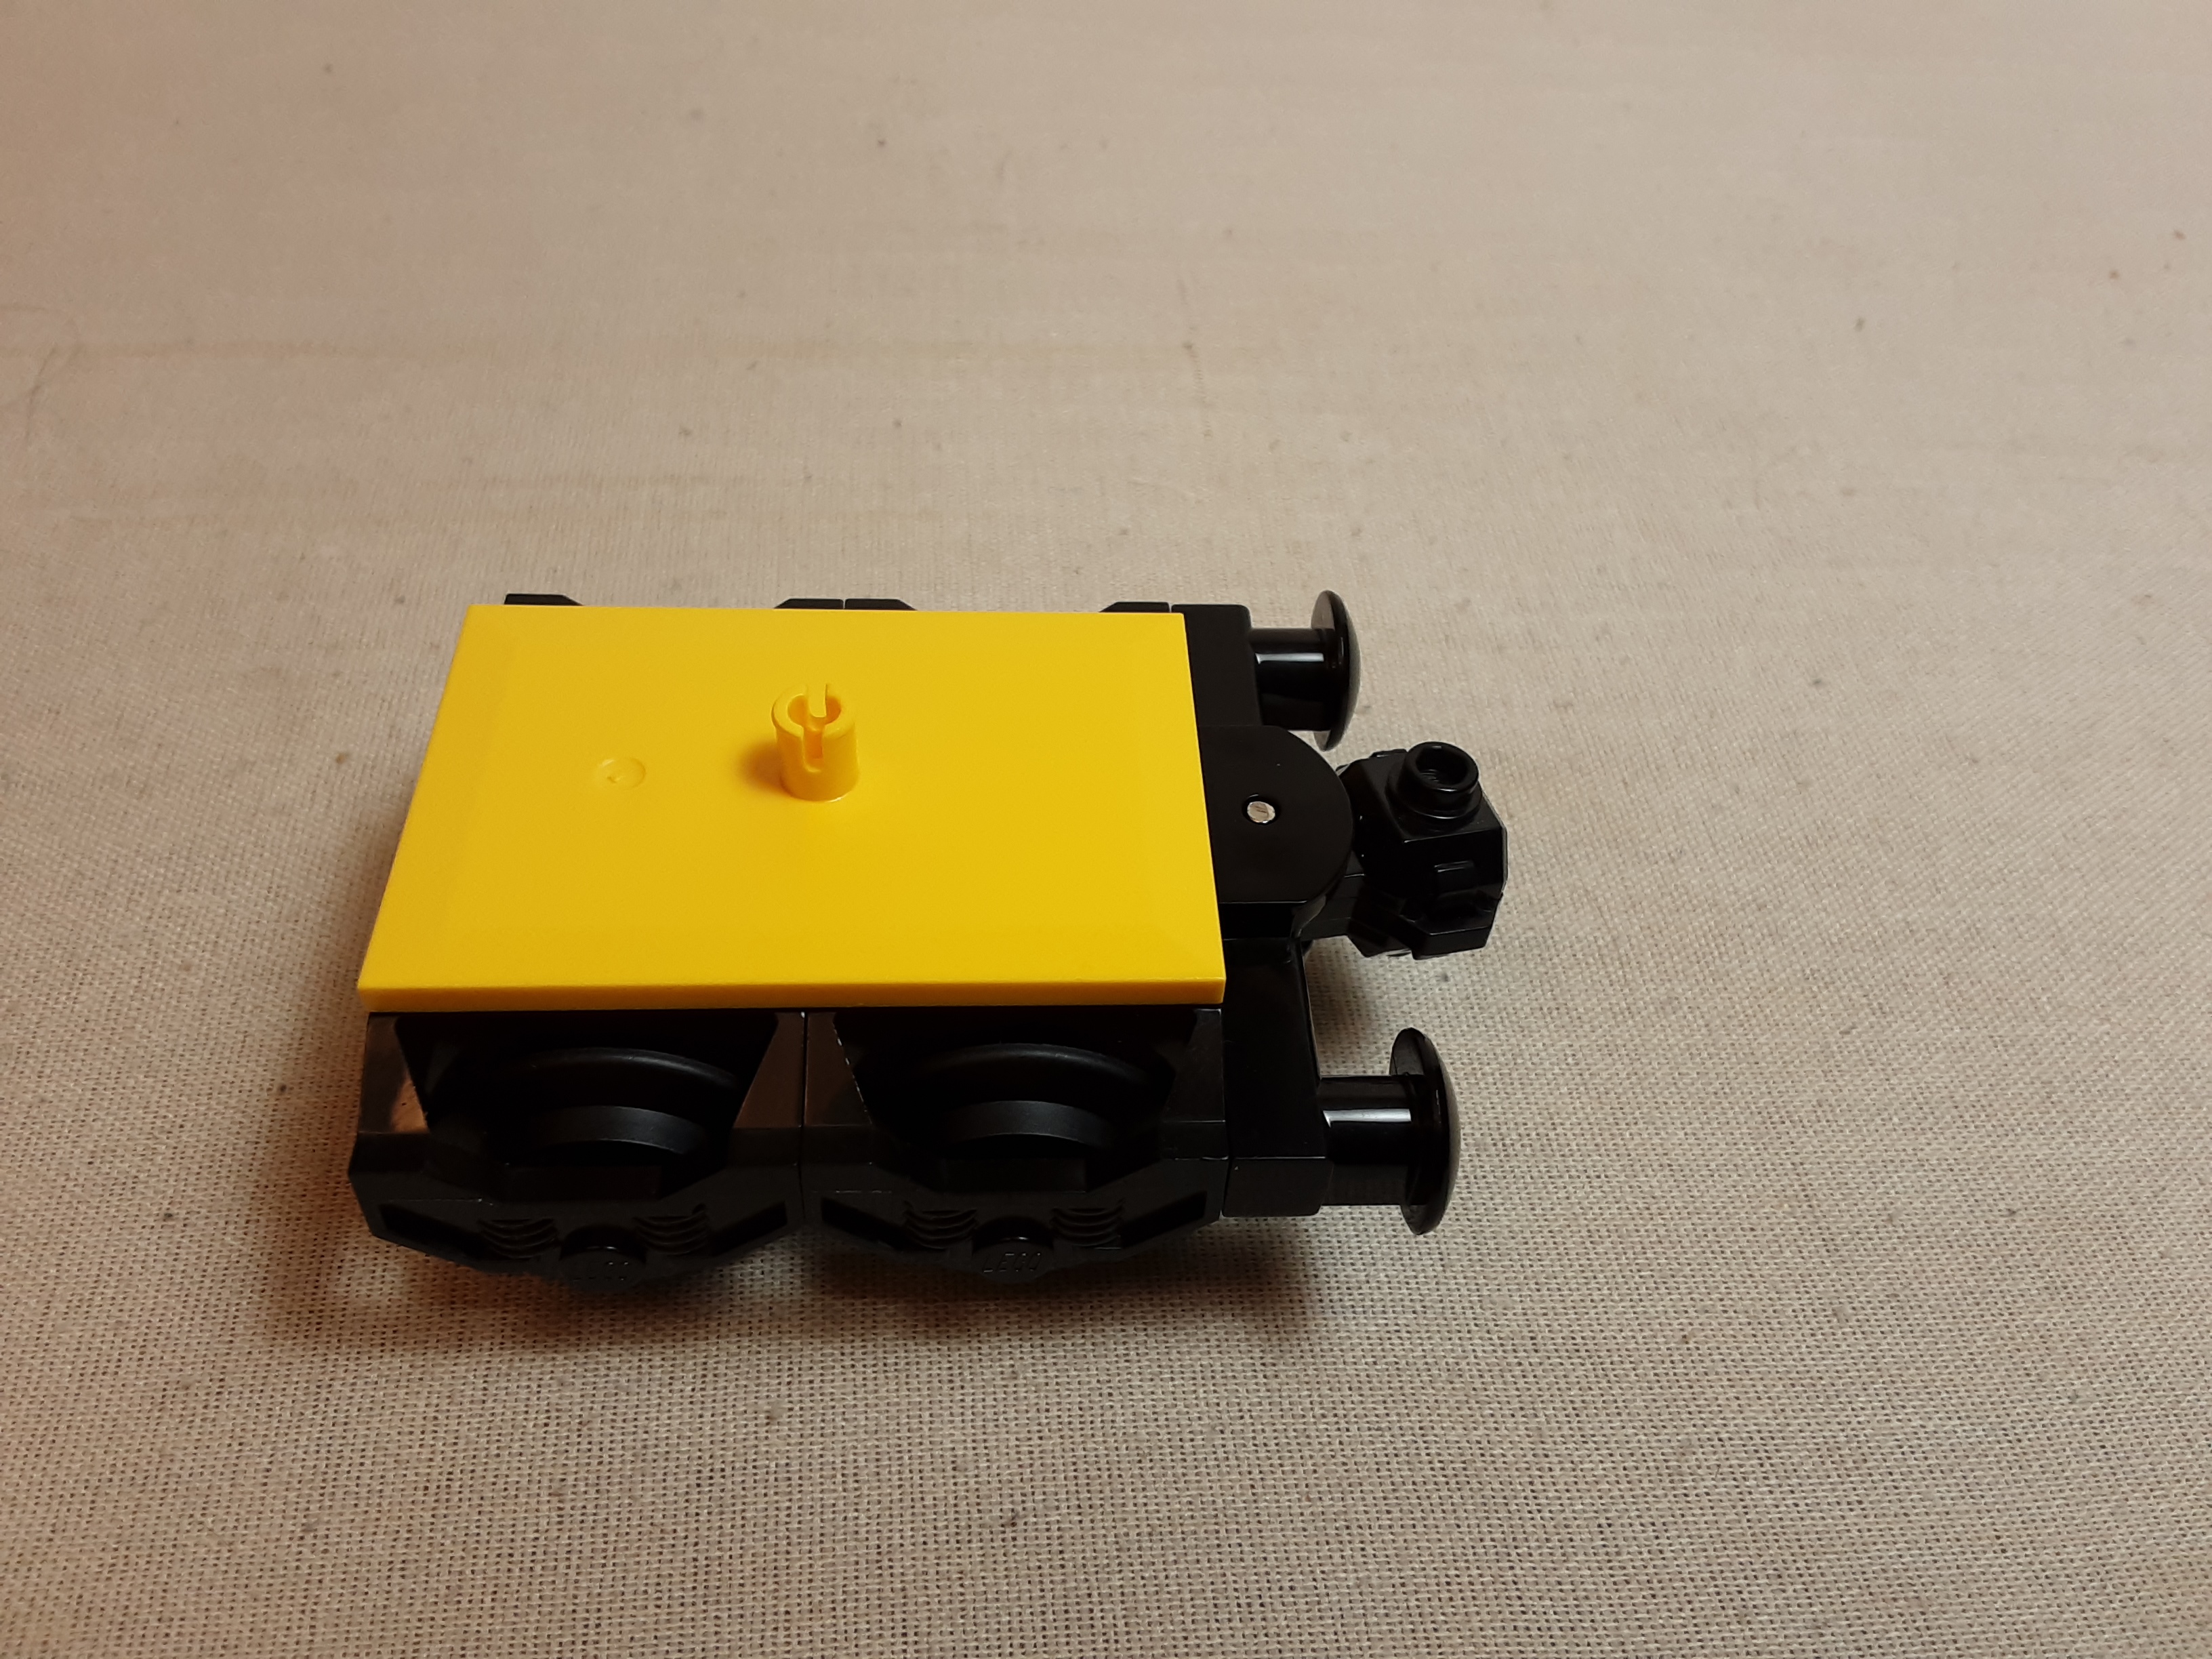
You will need to build another wheel assembly (with a Coupler) for the back end of the Train Chassis (shown on the left in the image). I would strongly suggest this would also use a Bogie Plate connection, as the work of pulling all of the train cars will be applying pressure to this important connection!
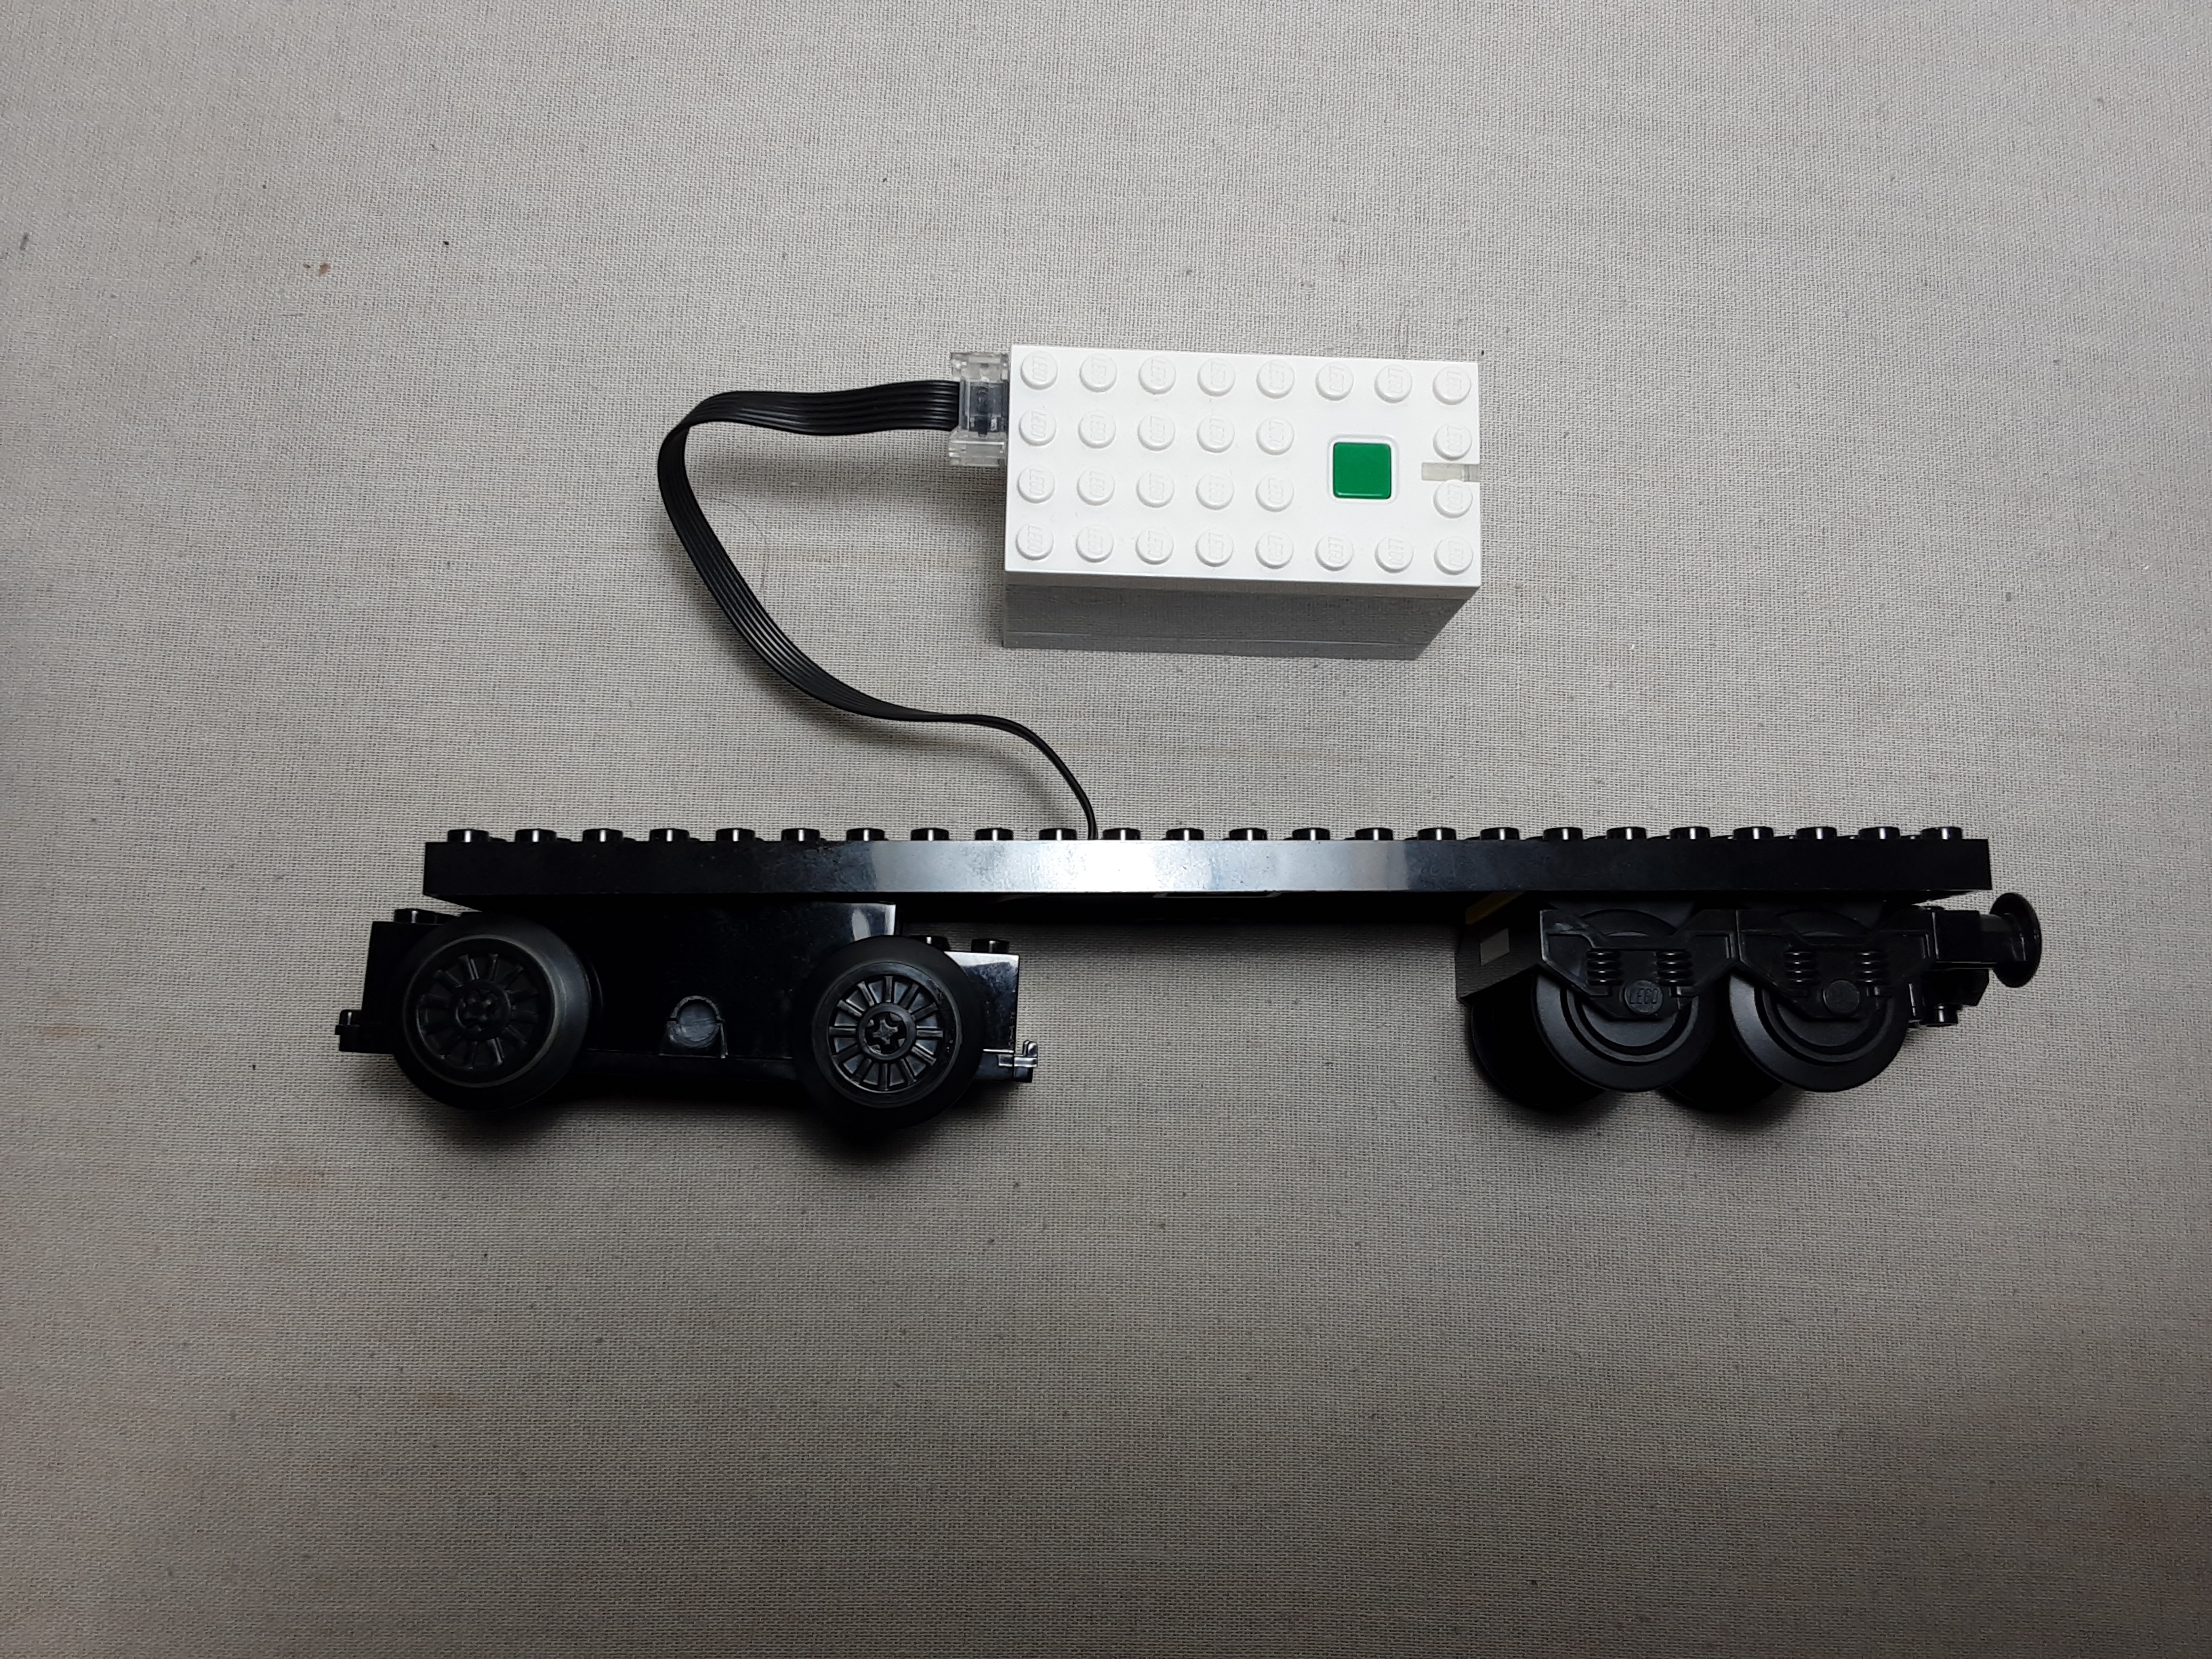
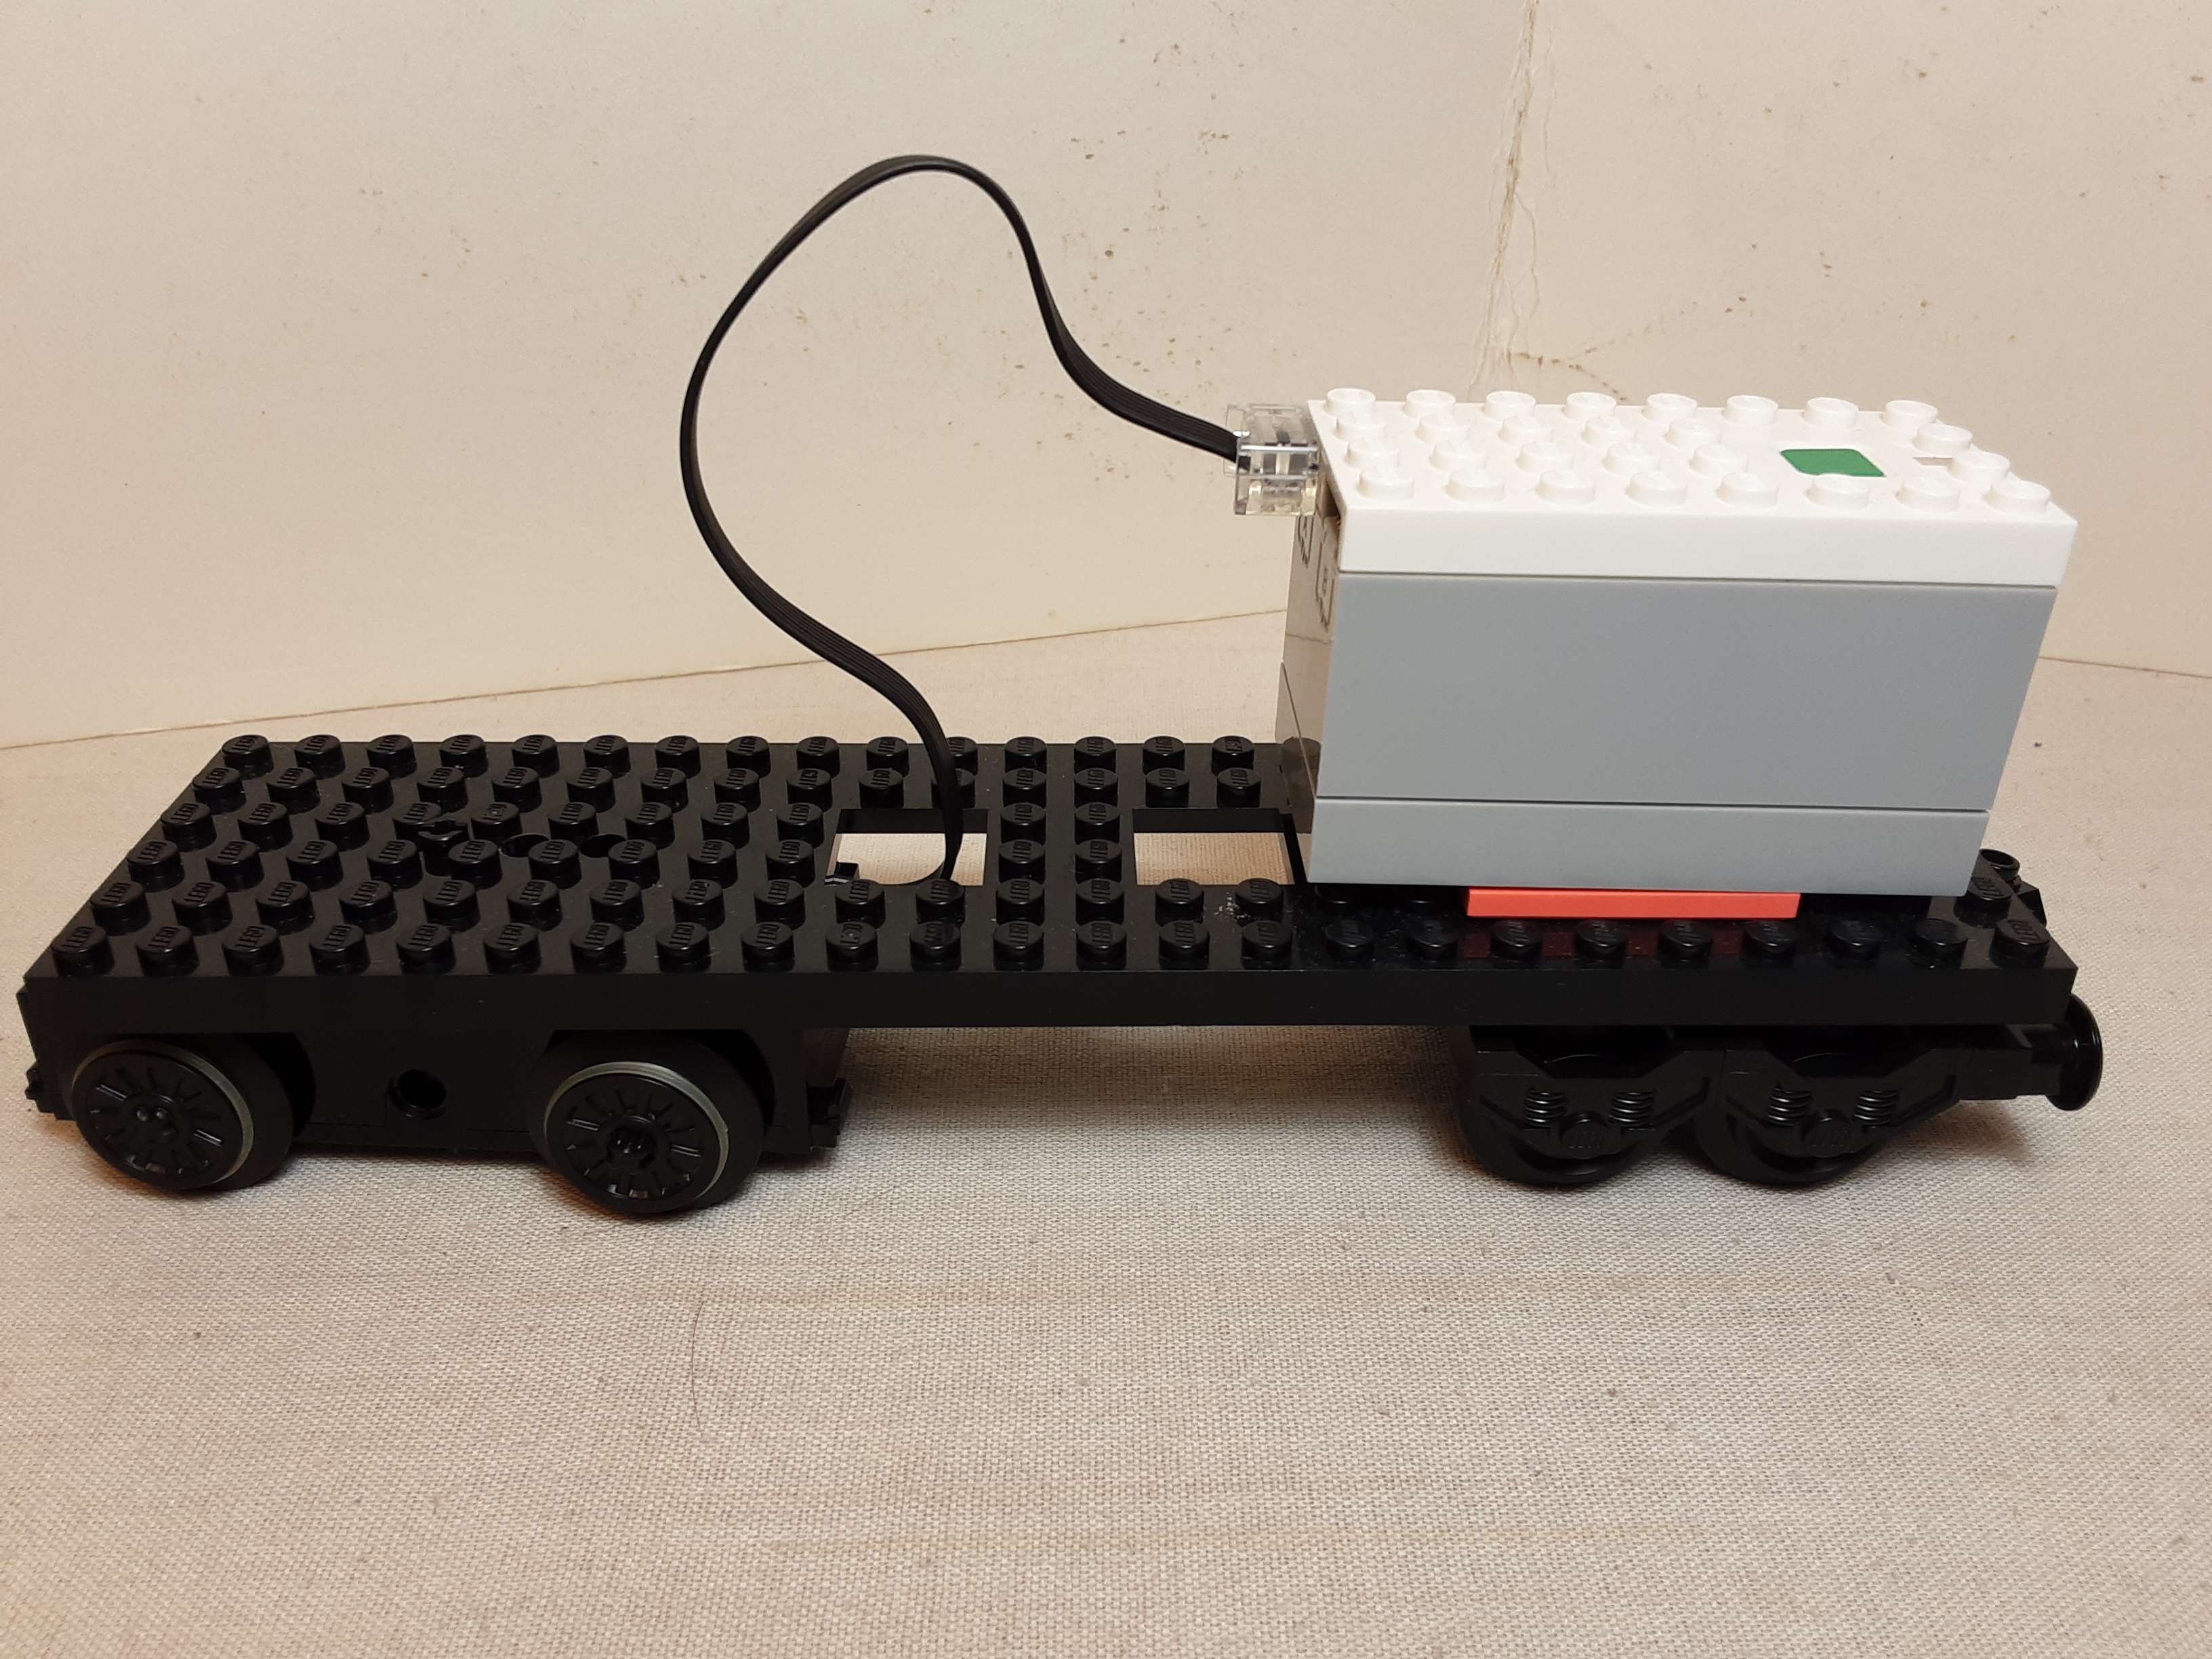
Once the motor assembly is complete, mount it to the Train Chassis using the desired hole. Here it is mounted on the left (front) side of the Train Chassis. Insure that the wired end of the motor is facing the chassis wire holes in the center. Then feed the wire through the hole.
Mount the normal wheel assembly with the coupler to the right (back) end of the chassis, insuring the coupler is extending beyond the back of the chassis. Normally this is the last of the 3 holes as shown.
In order for the train motor to work, it needs power and speed commands.
For this we use the Powered Up
2-port Hub (Set #88009). The wire
from the train motor plugs in to either Hub port. You must also load
batteries into the Hub (follow instructions provided with the Hub).
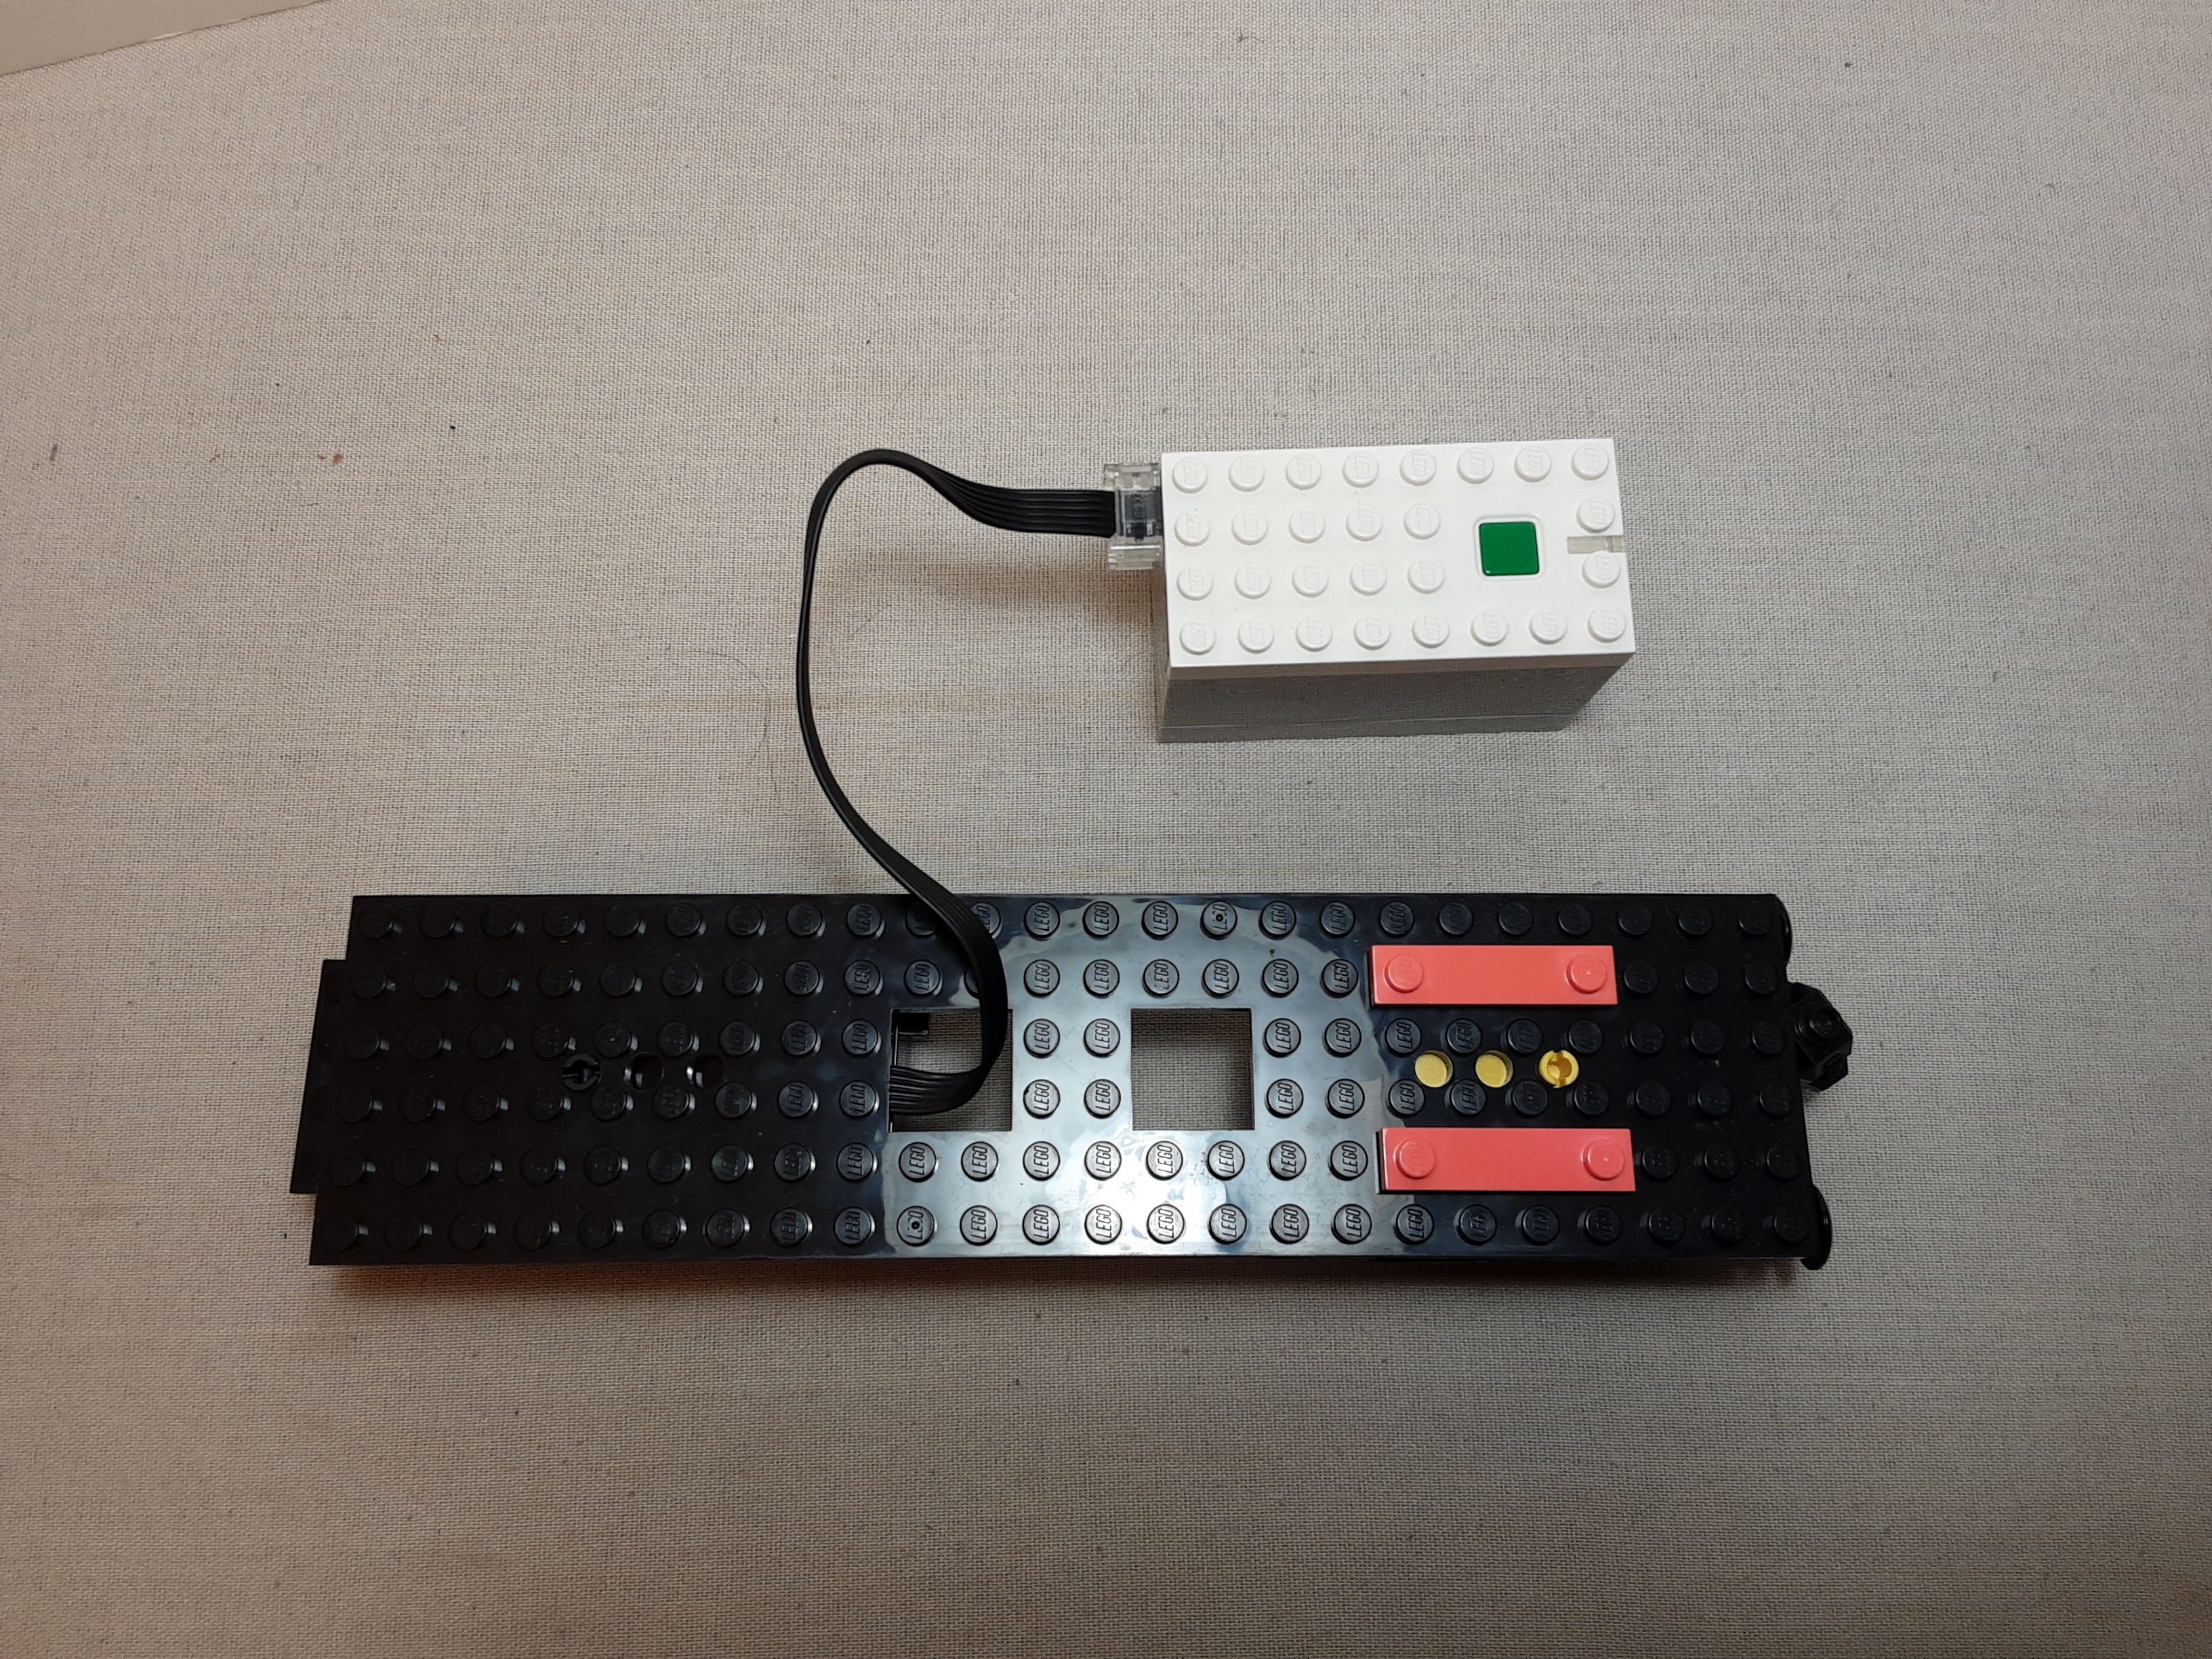
You can mount the Hub anywhere on top of the Train Chassis. I strongly suggest building a 'holder' for it (see image). Because the Hub uses batteries, it will need to be frequently taken out to change them. So a holder such as shown with 4 studs will keep it in place during usage but allow for an easier release when removing to change batteries. It is wise to also include easily removeable 'access panel(s)' when building your custom engine walls and roof so they can be taken off for easy Hub access!
Once the Hub is loaded with batteries and mounted onto its holder, you can test the system using either the remote control or the app.
For those new to the Powered Up
system, I strongly suggest that
you get familiar with operating the engine at this point before
building the walls and roof. Setup a track layout and run the
base engine to insure it moves freely around the track. Doing this
now insures the engine works properly, which can save you time and
effort if the engine does not work properly after adding other
structure to the engine.
I suggest removing the wheel assemblies whenever building or modifying an engine. Doing so prevents damaging the plastic wheels with excessive pressure during the building process. Just be sure that you do NOT cover the pin holes or wiring holes which will be used. Blocking those will prevent the wheel assembly from swiveling, making your engine unable to move along curved track!
Extras:
You are free to build your custom engine or train car in any way that you desire! But here are some things you may consider adding to your train for extra appeal.
Since the engine has a 2-port Hub, consider using the 2nd port for
train headlights. Using a Powered Up
2 light string (Set #88005),
you can mount the lights at the front of the engine using either a
1x1 brick with hole (Design #6541) or a 2x1 brick with hold (Design
#3700). Each light fits snuggly in one hole.
Lego makes a Powered Up
Color and Distance Sensor (Set #88007)
which can be controlled by the Lego Powered Up app using coding.
This would be connected to a port of a Hub. You could mount this
at the front of your engine in order to perform special activity.
For example, enable the sensor to detect specific color obstructions
on/near the track and have it cause the engine to slow down or stop
when such is detected.
Lego also has a 4-port Hub (Set #88012). This is much bigger than the 2-port Hub and will not fit on standard size (6-8 studs wide) train cars. But you can use other 2-port Hub(s) in the engine or on any train car. So you can add lights, a sensor, or even motorized activity on your custom train car. Be advised though that this adds a lot of weight to a train car. Heavier train cars should be placed as close to the engine as possible to prevent coupler detachments!
Track layouts:
This website already has a section about track layouts. But when building a custom train, we also need to think about the track layout and any obstacles near the track.
Long train cars (including the engine) need more easement around the track curves. Long cars should be at most 6 studs wide at their front and rear to not cause excessive overhang beyond the track.
Train car structure should be securely mounted to the car bed plate to prevent it from detaching and falling off of the train car. Track curves and higher speeds exert more pressure on a train car, so insure the structure can withstand this.
A train car with loose content should have walls high enough to insure that the movement of the content will not cause it to fall off of the car.
Weight distribution can be very important! Having more weight on the side of the train car which is toward the outside of a curve can cause the entire car to tip over. This is also true as weight is elevated higher above the bed plate and the train is traveling at higher speeds around a curve.
Now build it up:
Using the techniques described above (or even creating your own) should allow you to build a Lego train car base and then build whatever you desire on top of that!
You can use any Lego elements, Classic or even Technic parts! In fact, you could even build the train car bed using Technic elements instead of a plate.
Have fun creating a custom train!
Page last updated: November 06 2024 16:57:41.
Page visited: 1213
Terrys Place
Book, Motivation speaking, and Bullys
Facebook page
ICIC-ation YouTube channel
Vision and Driver/Bike/Pedestrian safety
Website design
Website programming and utilities:
© 2001-2026 Terry Erickson, All rights reserved.
Website layout and content:
© 2001-2026 Terry Erickson, All rights reserved.
Website hosting:

Proudly made in the USA!